


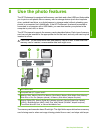


Edit photos using the control panel
The HP Photosmart offers several basic editing features that you can use to edit your
photos manually before you print them, as well as a feature that enables you to
automatically enhance your photos.
This section contains the following topics:
•
Zoom and pan to crop a photo
•
Rotate a photo
•
Adjust the brightness of your photos
•
Print a frame around your photo
•
Apply special color effects to your photos
•
Remove red-eye
•
Automatically enhance your photos
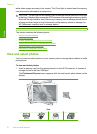
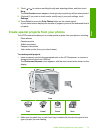
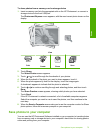
Zoom and pan to crop a photo
The HP Photosmart enables you to zoom in or out on a specific area of a photo. When
you print the photo, the photo is cropped so only the area shown on the display prints.
NOTE: The changes you make to the photo apply only to viewing and printing the
photo. The changes will not be saved on the memory card or storage device.
To crop a photo
1. Insert a memory card into the appropriate slot on the HP Photosmart, or connect a
storage device to the front USB port.
The Photosmart Express menu appears, with the most recent photo shown on the
display.
2. Touch View.
The View Photos screen appears.
3. Touch
or to scroll through the thumbnails of your photos.
4. When the thumbnail of the photo you want to edit appears, touch it.
5. When the selected photo appears by itself on the display, touch the image or touch
Options.
The Options menu appears.
6. Touch Edit.
The Edit menu appears.
7. Touch Crop.
The Crop screen appears.
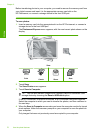
8. Touch the Zoom In or Zoom Out magnifying glass icons on the right side of the display
to zoom closer to or farther away from the subject of the photo.
An outline appears on the photo to show you an approximate view of the area that
will print.
Edit photos using the control panel 77
Photos