


1-33
Setting Up the Analyzer
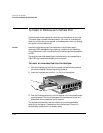
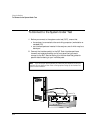
To Troubleshoot the Analyzer
1 Setting Up the
Analyzer
To Print a Window
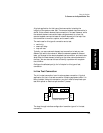
To Print a Window from the Notebook PC
1 Ensure that the printer is connected.
2 Make sure the window you want to print has the keyboard focus.
3 Press Alt-PrtSc.
4 From the Accessories program group, click the Paintbrush icon to
open Paintbrush.
5 From the Edit menu, select Paste to copy the captured screen into
Paintbrush.
6 From the File menu, select Print; then click OK. If you want, you can
save the file using the Save option on the File menu.
The captured window will print on your default printer.
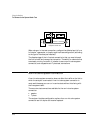
To Print a Window from an HP-UX Workstation
1 Make sure the window you want to print does not have any other
window in front of it.
2 In a shell window, type
xwd -out <file_name>
You must save and name the captured window file in order to print it.
The cursor turns into a cross hair.
3 Move the cursor over the window you want to save; then click the left
mouse button. The keyboard bell will sound three times.
4 Print the file using the xpr command. For example, to print to the
default LaserJet (PCL) printer, type the following in a shell window:
xpr <filename> | lp
If you want to specify a printer, add the -d<printer_name> command to
the end of the above string. See your HP-UX user’s guide for more
information.