


Page 5-5CHAPTER 5 MAINTENANCE & TROUBLESHOOTING
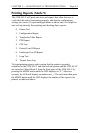
Printing Reports (Mode 9)
The 5250 ALLY will print nine tests and reports that allow the user to
verify that the unit is functioning properly, and that the configuration
settings are correct. If experiencing problems with the unit, it is helpful to
start solving them by first printing and checking these reports:
0. Printer Test
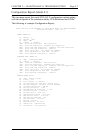
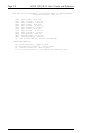
1. Configuration Report
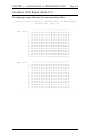
2. Translation Table Report
3. PFS Report
4. PFS Test
5. Portrait Font ID Report
6. Landscape Font ID Report
7. Loop Test
8. Twinax Error Log
To begin printing reports, make certain that the printer is properly
connected to the 5250 ALLY and that both the printer and the 5250 ALLY
are turned on. Select Mode 9 from the front panel of the 5250 ALLY by
pressing the MODE button until the LED displays an 9. After two
seconds, the LED will display an underscore (_). The user must then press
the MODE button until the LED displays the number of the report to be
printed, as indicated above.