86
Schedule Distribution Tool
Distributing schedules
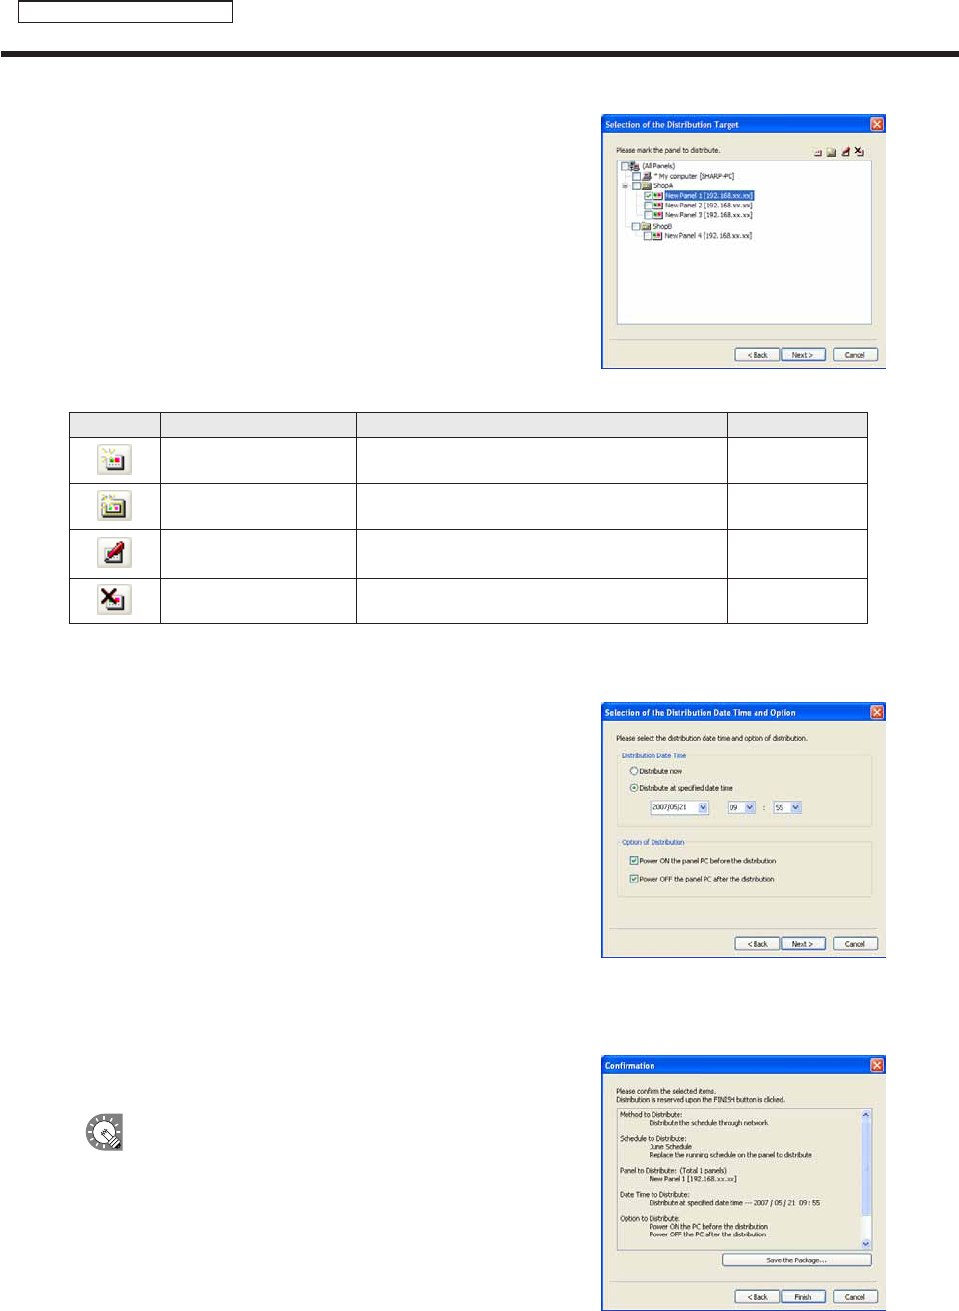
5. Check the check boxes for all the panels and/or groups
that the schedule is to be sent to.
Clickingthebuttonsinthetoprightofthewindowwillallow
you to add or edit panels and groups in the same way as the
[PanelManagement]window(
F
p.78).
The buttons perform the following actions:
Button Name Description Relevant page
AddPanel(PanelPC)
Adds a new panel to be managed.
F
p.79
AddGroup Adds a new group.
F
p.80
EditPanel/Group
Changesthecontentoftheselectedpanelor
group.
F
p.79-80
DeletePanel/Group Deletes the selected panel or group.
F
p.81
6. Click [Next].
The[SelectionoftheDistributionDateTimeandOption]dialogboxwillappear.
7. Select a “Distribution Date Time”.
• “Distributenow”optionbutton
Distributesscheduleassoonasthedistributionwizard
exits.
• “Distributeatspecifieddatetime”optionbutton
Distributes schedule at the set date and time.
8. Set “Distribution Options”.
• “PowerONthepanelPCbeforethedistribution”checkbox
DistributesthescheduleafterturningthetargetPConifitisnot
already turned on at the time of distribution.
• “PowerOFFthepanelPCafterthedistribution”checkbox
TurnsthetargetPCpoweroffaftertheschedulehasbeendistributed.
9. Click [Next].
A[Confirmation]dialogboxwillappear.
10. Check the distribution settings, and click [Finish].
Thedistributionordistributionreservationwillbeexecuted.
Distribution data can be packaged and saved as
asinglefilethatincludesscheduleinformation
including programs, timetables, and content.
Click[SavethePackage],andinthe[Savethe
Package]dialogboxthatappears,specifya
directorytosavethefileto.Thenentera“File
name”,andclick[Save].Thereisusuallynoneedto
use this function.
