89
Schedule Distribution Tool
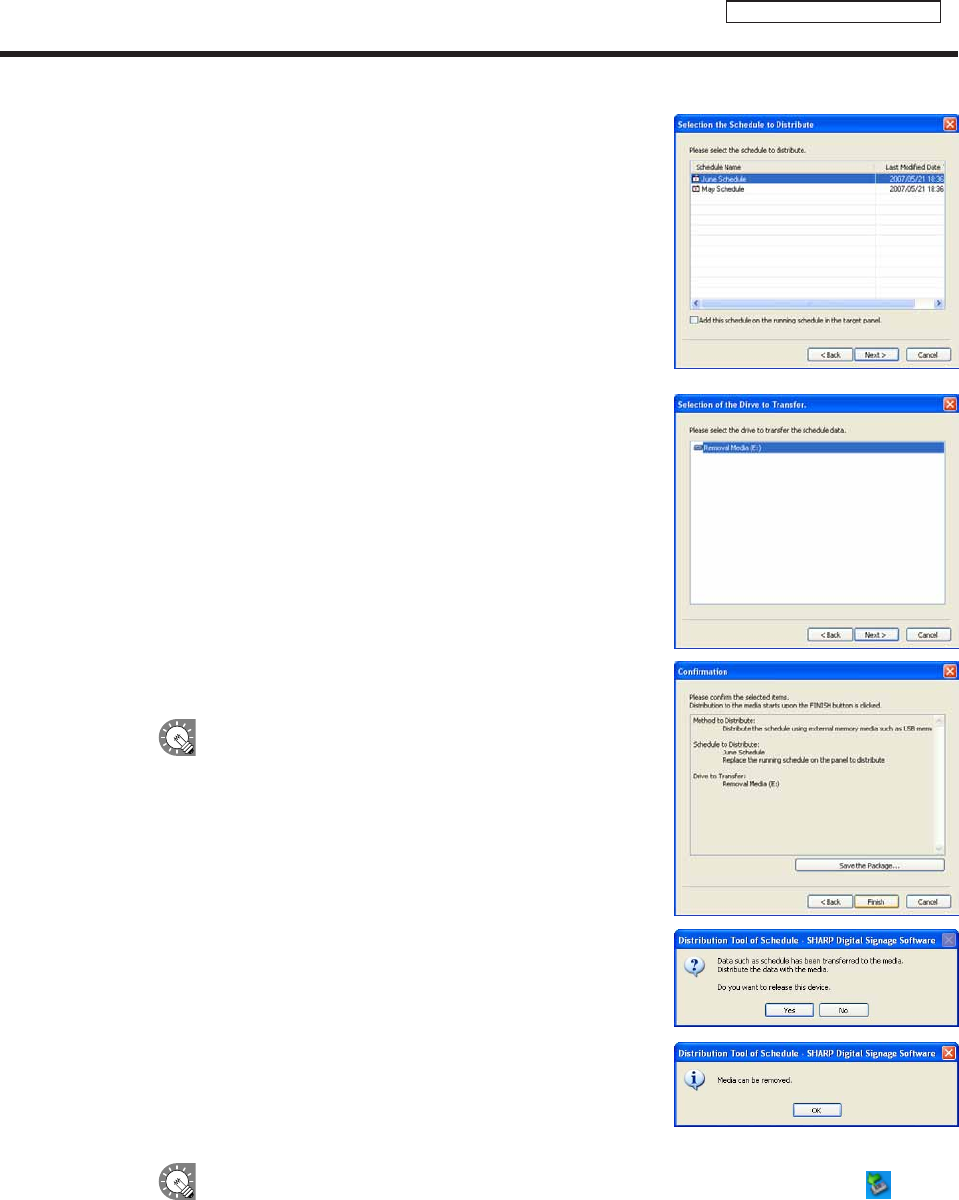
3. Select a schedule.
If you would like to add the selected schedule to the currently
openscheduleonthetargetPC,checkthe“Addthis
scheduleontherunningscheduleinthetargetpanel.”check
box.Iftheboxisnotchecked,thecurrentlyopenschedule
onthetargetPCwillbereplacedwiththecurrentlyselected
schedule.
4. Click [Next].
The[SelectionoftheDrivetoTransfer]dialogboxwillappear.
5. Select the drive to which you want to transfer the schedule to.
6. Click [Next].
A[Confirmation]dialogboxwillappear.
7. Check the distribution settings, and click [Finish].
Thedistributionwillbeexecuted.
Distribution data can be packaged and saved as a single
filethatincludesscheduleinformationincludingprograms,
timetables, and content.
Click[SavethePackage],andinthe[SavethePackage]
dialogboxthatappears,specifyadirectorytosavethe
fileto.Thenentera“Filename”,andclick[Save].Thereis
usually no need to use this function.
8. Click [Yes].
Aconfirmationdialogboxwillappearagain.
9. Click [OK].
10. Remove the USB memory or other storage device from
the PC.
Ifyouclicked[No]instep8,removethedeviceviatheSafelyRemoveHardwareicon( ) in the
Task Tray.
11. Connect the USB memory or other external storage device to the target PC.
Theschedulewillbeautomaticallydistributed.TheUSBmemoryorotherexternalstoragedevicewill
automaticallystopwhenthedistributioniscomplete.Checkthemessage,andremovethedevice.
Distributing schedules
