980541-001 Rev. A P640i Card Printer User Guide 71
Using IDPrint Lite
Assuming IDPrint Lite is stored in its default location,
launch it by going to the Windows Start menu, then
All Programs, then to Zebra Technologies followed by
ID Print Lite.
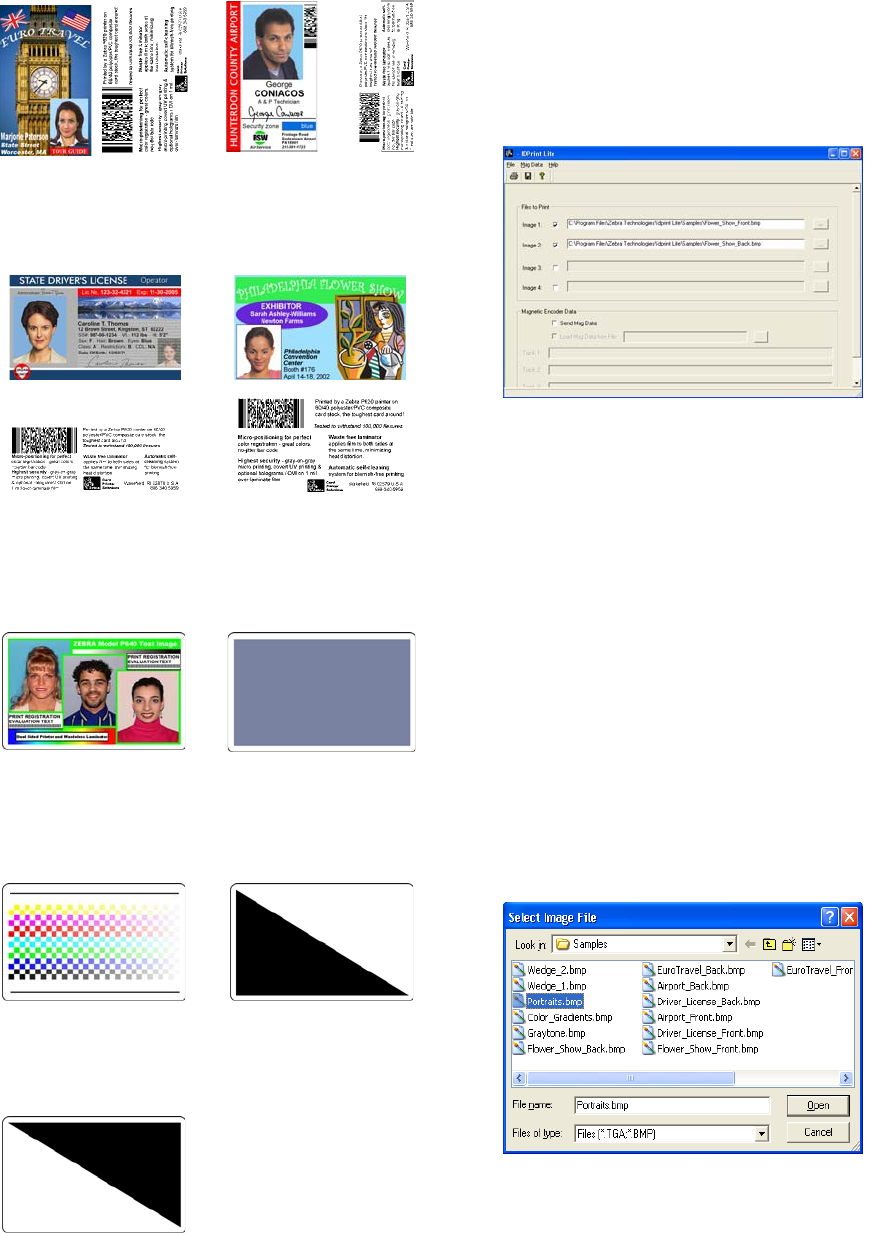
Typically, Image 1 is for the front of the card, and
Image 2 the back.
If a five panel ribbon is used, such as YMCKK or
YMCUvK, Image 2 is typically printed on the front of
the card with the K or Uv panel following C, and
Image 3 is printed on the back of the card with the
final K panel.
Image 4 is not used at this time.
To assign a file to Image 1, click the little square box
to the right of “Image 1”, then click the dotted button
at right of the Image 1 window. The Select Image File
screen (below) displays the sample files included with
IDPrint Lite. Highlight the file you want to be Image
1, then click Open. If you wish to use a file of your
own instead of the samples, navigate to the location in
which you saved the file (click and hold the down
arrow to display your computer’s various file
locations).
How Images 1, 2 and 3 are applied to the front and/or
back of the card, and the way in which they are
processed, is determined by two selections that
must be
made in the Printing Preferences Card Setup screen: 1.
Demo badge #1
(portrait format)
EuroTravel_Front.bmp
EuroTravel_Back.bmp
Demo badge #2
(portrait format)
Airport_Front.bmp
Airport_Back.bmp
Demo driver license
(landscape format)
Driver_License_Front.bmp
Driver_License_Back.bmp
Demo exhibitor badge
(landscape format)
Flower_Show_Front.bmp
Flower_Show_Back.bmp
Print test #1
Portraits.bmp
Test for realistic skin tones,
YMC registration in small text,
etc.
Print test #2
Graytone.bmp
Test for uniformity, blown
pixels, card flatness, etc.
Print test #3
Color_Gradients.bmp
Test for alignment of laminate,
light tone print quality
Print test #4
Wedge_1.bmp
Test for ribbon wrinkling
Print test #5
Wedge_2.bmp
Test for ribbon wrinkling


