


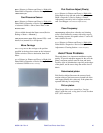

48 P640i Card Printer User Guide 980541-001 Rev. A
Adjusting the ribbon position drives the leading edge
of the panels forward or backward relative to the
printhead, the aim being to ensure that each swipe of
the head is centered in its color panel (this you can
easily check by inspecting image negatives from on
the takeup roll). The photos below show the effect of
incorrect ribbon positioning.
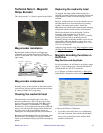
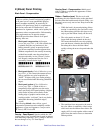
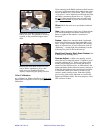
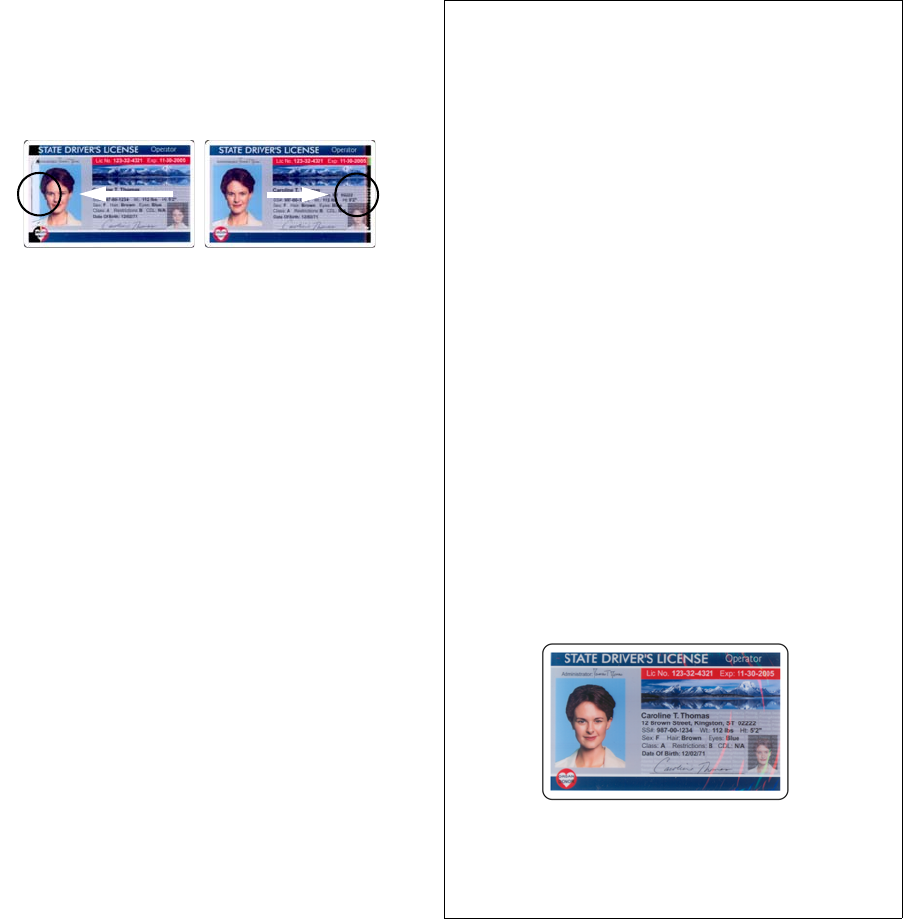
Ribbon positioning problems:
The arrows show the
direction of card movement. In the example at left, the ribbon
has advanced too far, with the result that the head swipes a
few millimeters of the following panel - see inside the circle.
Reduce the ribbon position parameter to correct this. The
example at right is the exact opposite - ribbon not advancing far
enough, so increase the position parameter to correct.
Ribbon - Torque Adjust (%): Adjusts the current
applied to the ribbon take-up motor (more current =
more torque), thus controlling the ribbon tension
between print head and take-up. Lowering the value,
default = 100%, can help reduce ribbon wrinkling (but
note that there are other factors, see Ribbon
Wrinkling, inset below).
The downside of reducing the ribbon torque is an
untidy, loosely wrapped takeup roll. That isn’t
important, except aesthetically, but low torque does
matter if the ribbon fails to advance when it should,
see Ribbon Position, left.
Printhead Position - Adjust: Adjusts the
downward motion of the printhead. The higher the
number, the greater the amount of overrun following
sensor activation. Ribbon Wrinkling
Printhead - Resistance (Ohms): This value
should match what is written on the printhead. Enter a
new value if the printhead is changed. If you enter a
lower number than what is printed on the head itself,
the printed image will be lighter than expected, and
vice versa.
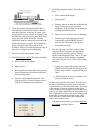
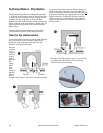
The printhead drive train comprises a stepper motor, a
gear quadrant, and a crank arm directly coupled to the
printhead bracket, photos below. In the down position,
the printhead spring is slightly compressed, with the
crank arm extended (which means that the torque
demand on the motor is at its lowest).
Increasing the printhead position parameter does not
result in a mesurable increase in head pressure, which
is more or less binary - it is either under spring
pressure, firmly in contact with the card, or not in
contact at all.
Adjustment procedure : If the printhead doesn’t press
firmly on the card during the printing “swipe”, there is
nothing to stop uncontrolled advancement of the
ribbon due to the takeup drive. To correct this,
increase the adjust parameter to the point where the
ribbon ceases to advance freely, then add 40 more to
the number.
Keep in mind the following:
• The amount of ribbon drag exerted by the supply arbor is con-
trolled by a friction clutch. This is set for a torque of approxi-
mately 5 oz-ins (36 mN.m), and should not be adjusted unless you
have a torque gauge.
• Ribbon drag exerted by the takeup arbor is controlled by varying
the current applied to the motor.
Ribbon wrinkling can be caused by one or more of
the following factors (but always try adjusting
ribbon torque first):
• Takeup torque too high
• Supply torque (drag) too high
• Too much preheat - ribbon sticking
• Dense patches with sharp transitions (text, graphic elements) on a
dark image
• Card thickness not uniform
• Printhead too hot because resistance value in flash memory higher
than actual head resistance
• Printhead angle adjust screwed down too far
• Printhead not pivoting freely
• Printhead rattling in frame
• Printhead not right-angled relative to card motion (yaw adjust)
Wrinkle control is essentially a balancing act of
several variables - especially the balance between
takeup and supply torques.
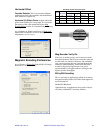
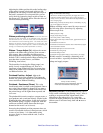
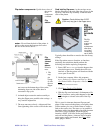
Example of ribbon wrinkling
Note the random curved, colored lines. The cure
in this case was reduction of takeup torque.