


980541-001 Rev. A P640i Card Printer User Guide 79
Firewall issues
Firewalls restrict data transferred over the network
only to those items specifically approved by the
network administrator. This can have the effect of
making a network connected printer such as the Zebra
P640i unavailable to network users.
If a personal firewall is installed on the PC you are
using to set up the P640i Ethernet option:
1. Probing for the printer will fail if the firewall does
not allow broadcast UDP (User Datagram
Protocol) requests.
2. Probing for the printer will fail if the firewall does
not accept responses from UDP probes (often
because the firewall does not properly register the
outgoing UDP port as valid for response traffic).
3. Probing for the printer will fail if the firewall
disallows packets destined for UDP port 9099.
4. Printing and printer communications will fail if
the firewall disallows packets destined for TCP
(Transmission Control Protocol) port 9100.
The above caveats apply equally to a firewall installed
in a network router, the difference being that such a
firewall affects ALL traffic across it, not just traffic to
and from a lone PC.
If probing fails, you could in theory enter manually
the IP address for the printer in the appropriate driver
setup screen. However, because the IP address is not
known until the printer is configured, this is a Catch
22 situation.
Configuring the Ethernet option
Installing any device via Ethernet can be challenging,
even to the experienced technician. There is no
universal formula for success. If you do not achieve
satisfactory results after following the directions given
here, contact Zebra support for further advice.
Hardware setup
Make sure the computer on which you are installing
the P640i is connected to the network.
Switch on the printer, then test for functionality by
printing a test card (press the PRINT button).
Connect the Ethernet port (RJ45 receptacle) on the
P640i printer to the network through a hub, switch or
router. Use only a pass-through cable (also known as
straight-through).
Software setup
1. Obtain from your network administrator the
following three sets of numbers: Static IP address,
Netmask (a.k.a. Subnet mask), Gateway
(optional).
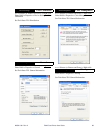
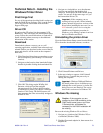
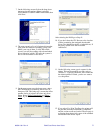
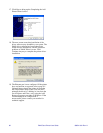
2. Using either downloaded software or the provided
CD, display the Zebra printer setup screen, then
click Install a Printer and Driver:
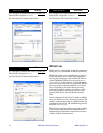
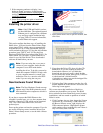
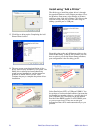
3. Select Ethernet (Internal), then click Next.
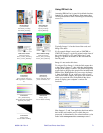
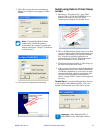
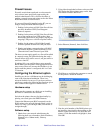
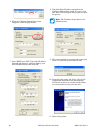
4. Click Browse, and allow the computer to search
for the printer’s default IP address.
5. Note the serial number of the P640i printer you
are installing, then look for that number on the
Browse screen (which may list more than one
printer). Click that number to highlight it, then
click OK.