


980541-001 Rev. A P640i Card Printer User Guide 83
Technical Note 10 - Printer
Pooling
Set up the Printers individually
For illustration, we will establish a pool of three
printers. Install and setup the printers as outlined in
Tech Note 9. The printers can have any names of your
choosing: here we will name them Zebra P640i 1,
Zebra P640i 2, Zebra P640i 3, and we will assume
they are attached to ports ATLUSB001, ATLUSB002,
ATLUSB003, respectively.
Before proceeding to pool the printers, test them
individually, and be sure they are configured
similarly. Specifically, check the following:
• Ribbon panel configuration (ribbon type, and
what prints on which side of the card)
• Mag encoding configuration
• Black extraction configuration (if applicable)
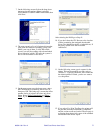
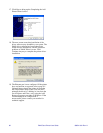
Create the pool
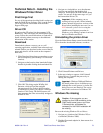
1. Go to Start > Printers and Faxes > Add a Printer
2. Click Next
on the Add Printer Wizard welcome
screen.
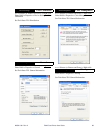
3. Select Local Printer
. Make sure that
Automatically Detect My Plug and Play Printer
is
unchecked, then click Next
.
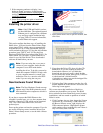
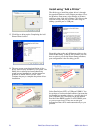
4. Select Use the following port
, and choose the port
that the first printer is on. In this illustration, this
will be ATLUSB001
.
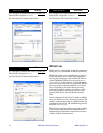
5. In the printer list, choose Zebra Technologies
as
the manufacturer, then choose (for this
illustration) Zebra P640i
. Click Next.
6. On the next screen, choose Keep Existing Driver
,
then click Next
.
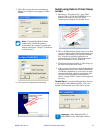
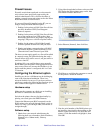
7. Choose something meaningful for the printer
name -Pool, for example. Decide whether or not
this is to be the default printer, then click Next
.
8. Decide whether or not the pool is to be shared,
then click Next
. (“Shared” means that other
networked computers will be able to send jobs to
the pool.)
9. Choose no test page, then click Next
.
10. Click Finish
.
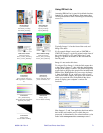
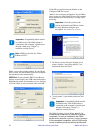
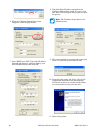
In Printers and Faxes, there should now be a printer
called Pool, or whatever you named it.
11. Right click on Pool
, then click Properties.
12. Click the Ports
tab.
13. Check the Enable Printer Pooling
box.
14. In the list of ports, select the other ports that have
printers connected to them (remember that only
one port was selected on the initial install). For
this illustration, check the ATLUSB002 and
ATLUSB003 ports, then click OK.
The setup now is three printers (Zebra P640i 1, Zebra
P640i 2, and Zebra P640i 3), and one “pool”, which is
all of them.
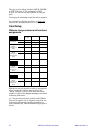
Using the printer pool
Send print jobs to the pool, not to an individual
printer. When the first printer has taken as many jobs
as it can handle (that being two jobs - one to be printed
immediately, the other waiting), the following jobs
“spill over“ to the second printer, and then to the third
printer.
Notice that if you are only printing two jobs, they
would both go to the first printer. Pooling is a spill-
over methodology. It does not balance printer usage.
Once the pool has been set up, maintenance and
configuration changes should be done through the
menus for each individual printer (e.g., Zebra P640i
1), not through the pool (which can produce
undesirable results).
Important • n the P640i, many of the
configuration variables are stored in the
printer itself, unlike the typical printer as
defined by Microsoft. All pooled P640i
printers must be set up similarly.
Note • The effect of any maintenance or
changes can (and should) be tested by
sending print jobs separately to each
printer, not to the pool.