


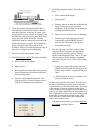

980541-001 Rev. A P640i Card Printer User Guide 41
Technical Note 3 - Magnetic
Stripe Encoder
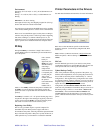
The “mag encoder” is a factory option for the P640i.
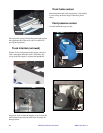
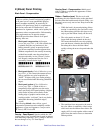
Mag encoder installation
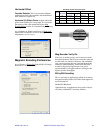
Replacement read/write heads are shipped pre-
assembled to the bracket shown here. Check the
location of the yellow wire. This must be in the lower
right corner.
Mag encoder components
Shoulder screws at the two ends of the bracket allow
vertical float. Springs hold the read/write head firmly
in contact with the card’s mag stripe.
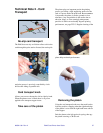
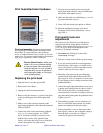
Cleaning the read/write head
The head needs to be cleaned only if encoding
becomes troublesome. (This will show up as extra
passes of the card under the head if the Mag Verify
function is enabled - recommended - in Printing
Preferences.) To clean the head, turn power OFF and
remove all cards from the hopper. Drive the truck to
the right, clear of the mag encoding station, by
rotating the card transport knob left of the laminator.
Reaching down through the floor of the hopper, clean
the head with a Q-Tip dipped in isopropyl alcohol.
Allow several minutes drying time before running the
printer.
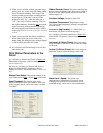
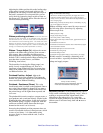
Replacing the read/write head
As shipped, the replacement read/write head is a
complete assembly comprising mounting bracket and
clamp hardware. Other screws and springs are not
included.
Remove, setting aside for re-use, the shoulder screws
and adjustment screw from the defective assembly,
together with springs and washers. Install the
adjustment screw in the replacement bracket, bringing
its tip flush with the bottom surface of the bracket.
Check how the head sits in the bracket. Look for
symmetry, with the upper rim of the head
(surrounding the “potted” wires),
almost even with the
bracket, just a hair below. Install the encoder
assembly, taking care that the shoulder screws do not
clamp either end of the bracket or the washer at the
right hand end. Check that the assembly is
free to move
up and down
at both ends.
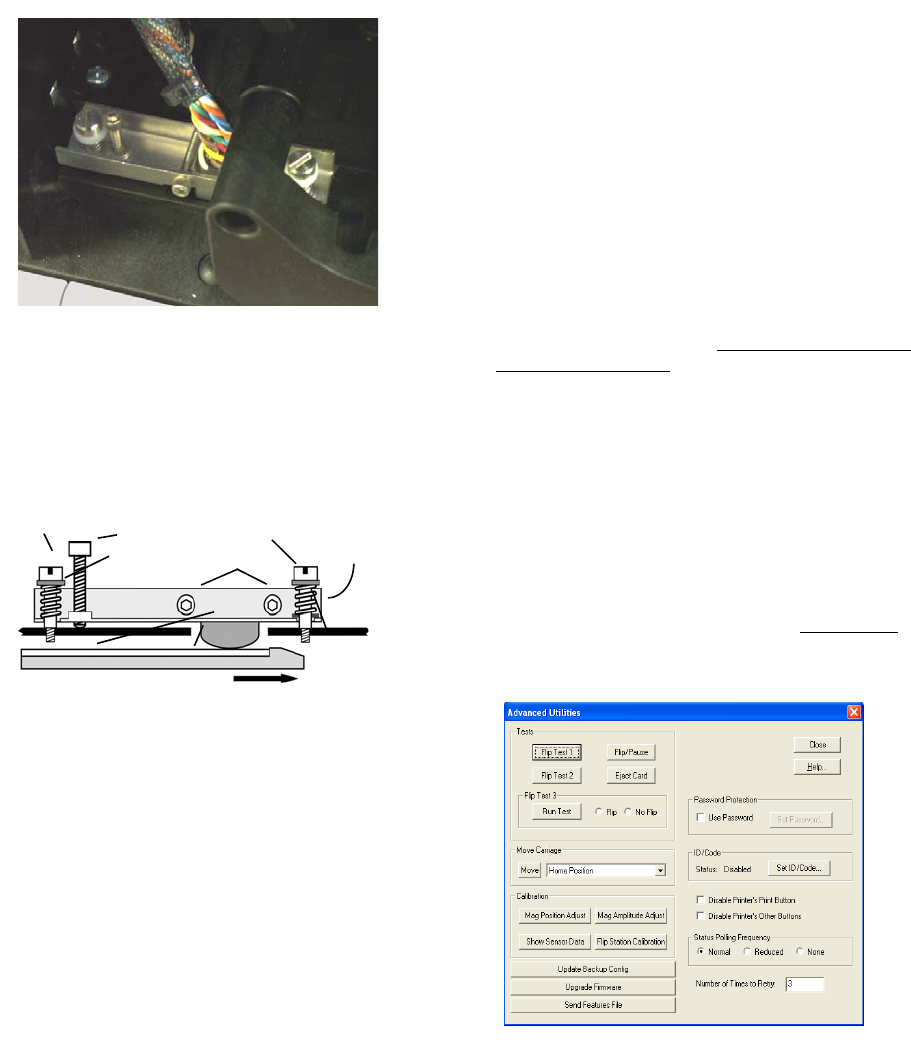
Adjust the mag encoder using Mag Amplitude Adjust
and Mag Position Adjust utilities in the Windows
printer driver, see below.
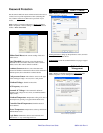
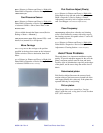
Magnetic Encoding Functions in
the Driver
Mag Position and Amplitude
For this procedure you will need to cut a feeler gauge
about ¼" wide (6 mm) from a standard CR-80 card
(which should be 0.03”/0.75 mm thick).
Start > Printers (or Printers and Faxes) > Right click
Zebra P640i > Properties > Device Settings > Control
> Advanced Utilities > Calibration
1. If you have not already done so (see Replacing
the read/ write head, above) back off the adjust-
ment screw (counterclockwise) until the head
bracket is fully down.
Shoulder
screw
Adjustomg
screw (3/32"
Spring
Clamp
Screws
Nylon
Washer
Steel
Washer
Spring
CardRead/Write
head