980541-001 Rev. A P640i Card Printer User Guide 77
7. On the following screen click on the drop down
arrow to view the options. Select (typically)
ATLUSB001 for USB or PHID1 for Parallel, then
click Next.
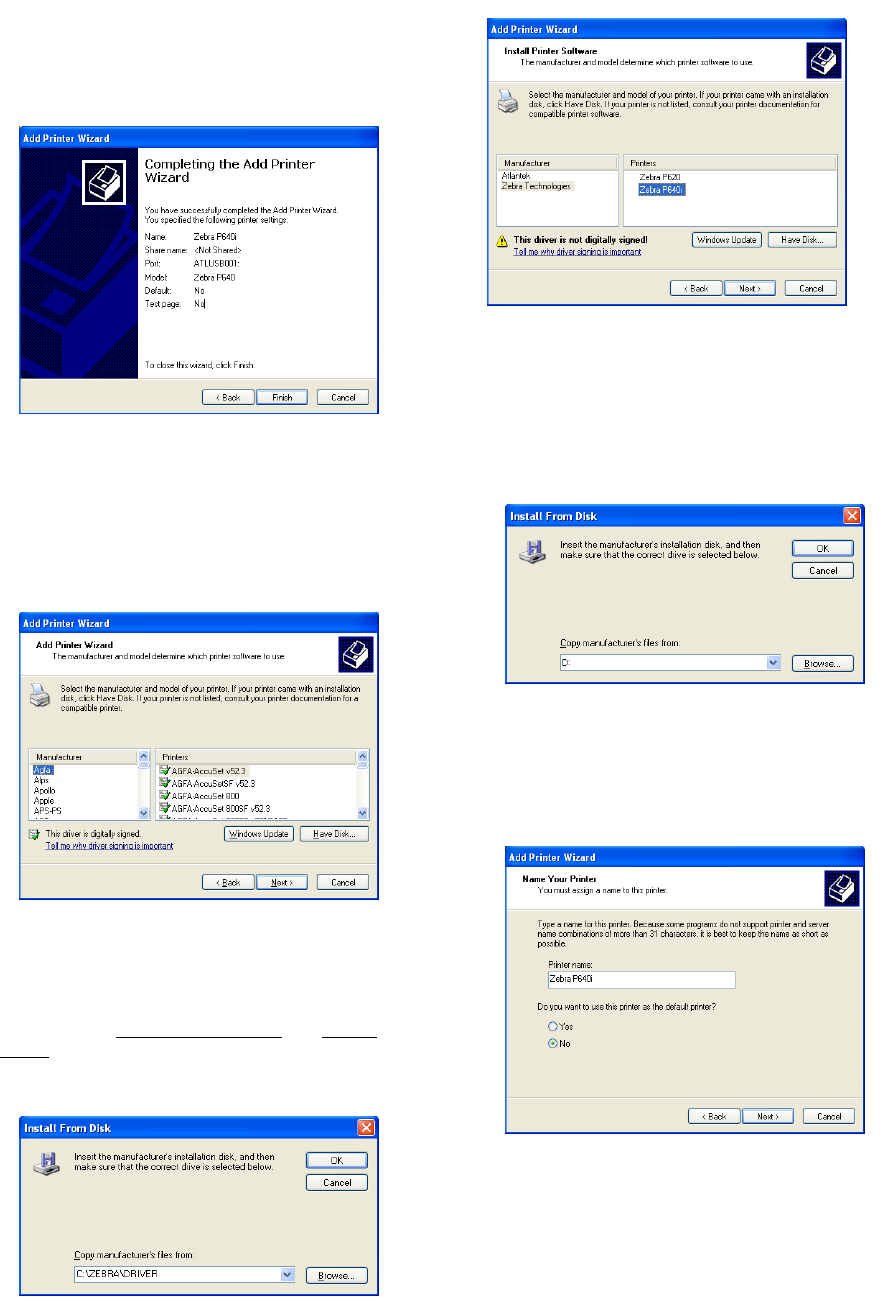
8. The next screen is a list of all printer drivers that
came with the Windows operating system. The
P640i is not one of them, so click Have Disk
(even if you will be working with a downloaded
driver instead of a disk). This tells the system it
has to look elsewhere for the driver.
9. On the next screen press the down arrow, select
the CD-ROM drive containing the Driver CD,
then press OK. This brings up a screen that offers
another choice of printers, this time only from
Zebra. Select Zebra Technologies
and Zebra
P640i. If you don’t have the CD, go to Step 10.
After selecting the P640i go to Step 11.
10. If you don’t have the CD, Browse to the location
(folder) containing the unzipped downloaded
driver files (default location is c:\zebra\driver). If
necessary, double click the file named
AtlPrint.inf.
11. On the following screen type in a name for the
printer. This can be anything you like, such as
“Printer A”. Typically, check No, don’t make this
the default printer. If asked, you do
NOT want to
share the printer.
12. If you select Yes, Print Test Page, the printer will
do just that when the installation is completed,
and the various media are loaded. The test page is
a clipping from the top left corner of the standard
Microsoft Printer Driver report.


