148 CHAPTER 7: MANAGING AND MONITORING YOUR NETWORK
Using the Image Repository
Use the image repository to add or delete WX system images. The image
file is checked and its version is verified when added to the image
repository. Images are stored in the
3WXM_installation_directory\xml\images directory.
To add a system image:
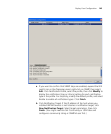
1 Select Tools > Image Repository. The Image Repository dialog box
appears.
2 Click Add Image. The Add to Repository dialog box appears.
3 Navigate to the directory containing the system image.
4 Select the system image.
5 Click Add to Repository. The image is added to the image repository
and appears in the Image List.
6 To close the Image Repository dialog box, click Close.
To delete a system image:
1 In the Image Repository dialog box, select the image you want to delete.
2 Click Remove Image. A prompt appears.
3 Click Yes to delete the system image.
Click No to cancel the deletion process.
4 To close the Image Repository dialog box, click Close.
Distributing System Images
You can distribute a system image to one or more WX switches.
Optionally, you can distribute compatible configuration information from
the network plan to the WX switches at the same time. To use a new
system image, you must reboot the WX switch.
3Com recommends that you verify the network plan and correct any
configuration errors before distributing system images. Select Manage >
Verification.
To distribute a system image:
1 In the main 3WXM window, select Changes > Distribute Images &
Configuration.
The Distribute Images & Configuration dialog box appears.


