


Installing 3WXM 21
On each switch in the network plan, you must enable notifications and
configure 3WXM Services as a notification target (trap receiver).
3WXM Services does not start listening for SNMP notifications from
switches until you save the network plan.
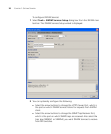
From the Key Store area of the window, specify security settings.
From the Access Control area, define user accounts. For more
information about access control, see “3WXM Access Control” on
page 21.
By default, a username and password are not required to access 3WXM
Services from 3WXM client, but only local connections (connections from
client to server on the same host) are allowed. To change these settings,
use the Service Settings tab of the 3WXM Services Setup dialog.
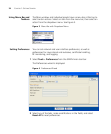
To select monitoring settings:
All monitoring options are enabled by default. You do not need to enable
them and you do not need to specify the switches you want to monitor.
However, for 3WXM Services to receive trap data from WX switches,
SNMP notifications must be enabled on the switches. (See “Deploy Your
Configuration” on page 144.)
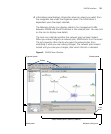
To start gathering data for monitoring, deploy your configuration to the
network. For information about deploying your configuration, see
“Deploy Your Configuration” on page 144.
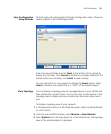
3WXM Access Control You can create a user account with administrator, provision, or monitor
privileges. See Table 6 for privilege definitions.
To configure access control:
1 Select Tools > 3WXM Services Setup from the 3WXM main tool bar.
The 3WXM Services Setup window is displayed.
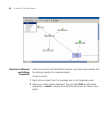
2 In the Access Control area of the window, deselect Allow all users.
Table 6 User Privilege Levels
Privilege Level Access Control Configuration Monitoring
Administrator yes yes yes
Provision no yes yes
Monitor no no yes