


72 CHAPTER 3: CONFIGURING WIRELESS SERVICES
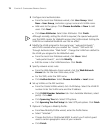
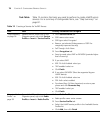
3 Configure local authentication.
From the Local User Database wizard, click User Group. Select
New > User Group, and enter a group name and a VLAN name.
Add users to the group. Click Choose Available or New to add
users. Click Next.
Click User Attributes. Select User Attributes. Click Finish.
Although normally, setting the VLAN is required, the special web-portal
user that MSS creates for WebAAA assigns the VLAN instead. Setting the
VLAN for an individual WebAAA user has no effect.
4 Modify the VLAN assigned to the special user “web-portal-Guests”,
which MSS created when you created the “Guests” SSID with Fall
Through Authentication “Web Portal”. Change the VLAN from default to
the VLAN you assigned to the WebAAA users.
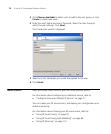
From the Local User Database wizard, click Users. Select
“web-portal-Guests”, and click Modify.
Edit the name in the VLAN Name box. Click Finish.
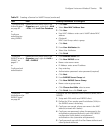
5 Specify network access rules.
From the Web Network Access wizard, click the Web Network
Access tab. For the User Glob value, enter “**”.
For the SSID, enter the SSID name.
Click Authentication. Select Choose Available > Local server.
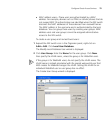
6 Set up VLANs on the WX switches.
From the Create VLANs wizard, click VLAN Setup. Select the VLAN ID
number. Enter the VLAN name and the IP address.
Click VLAN Member Selection tab. From Available Members, select
port(s). Click Add
Click Spanning Tree tab. Select STP options.
Click Spanning Tree Port Setup tab. Select STP port options. Click Finish.
7 Optional: Configure a Mobility Profile.
From New Mobility Profile wizard, enter the Profile Name.
Select “Selected.”
Choose the Ports or Distributed MAPs to which you’ll restrict guest
users to certain geographic areas of your network.
Click Finish.