


18 CHAPTER 1: GETTING STARTED
Installing 3WXM The same 3WXM install program installs either just the 3WXM client or
both the 3WXM client and 3WXM Services.
This section contains information about the following topics:
“Unpacking Files” on page 18
“Using the Installation Wizard” on page 18
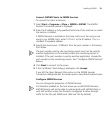
Unpacking Files To unpack files on Windows systems:
1 Insert the 3WXM CD in the CD-ROM drive. If Autorun is enabled, wait
briefly for the install program to start. For more information about using
the installation wizard, see “Using the Installation Wizard” below.
If Autorun is disabled, follow these steps:
a In Windows Explorer, navigate to your CD-ROM drive.
b In the Windows\VM directory, double-click install.exe.
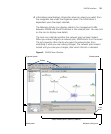
The Introduction page of the 3WXM installation wizard appears.
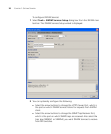
2 Click Next to display the Choose Installation Type page of the installation
wizard, and go to “Using the Installation Wizard”.
Using the Installation
Wizard
To use the Installation Wizard:
1 On the Choose Installation Type page, choose one of the following:
To install both the 3WXM server and the client, click the 3WXM
Services icon.
To install only the 3WXM client, click the 3WXM client icon.
For detailed installation instructions, see “Installing 3WXM” in the
Wireless LAN Switch Manager Reference Manual.
Start the 3WXM Services
The 3WXM Services are automatically started when you install it on a
Windows system.