4. Stacking CLM projectors
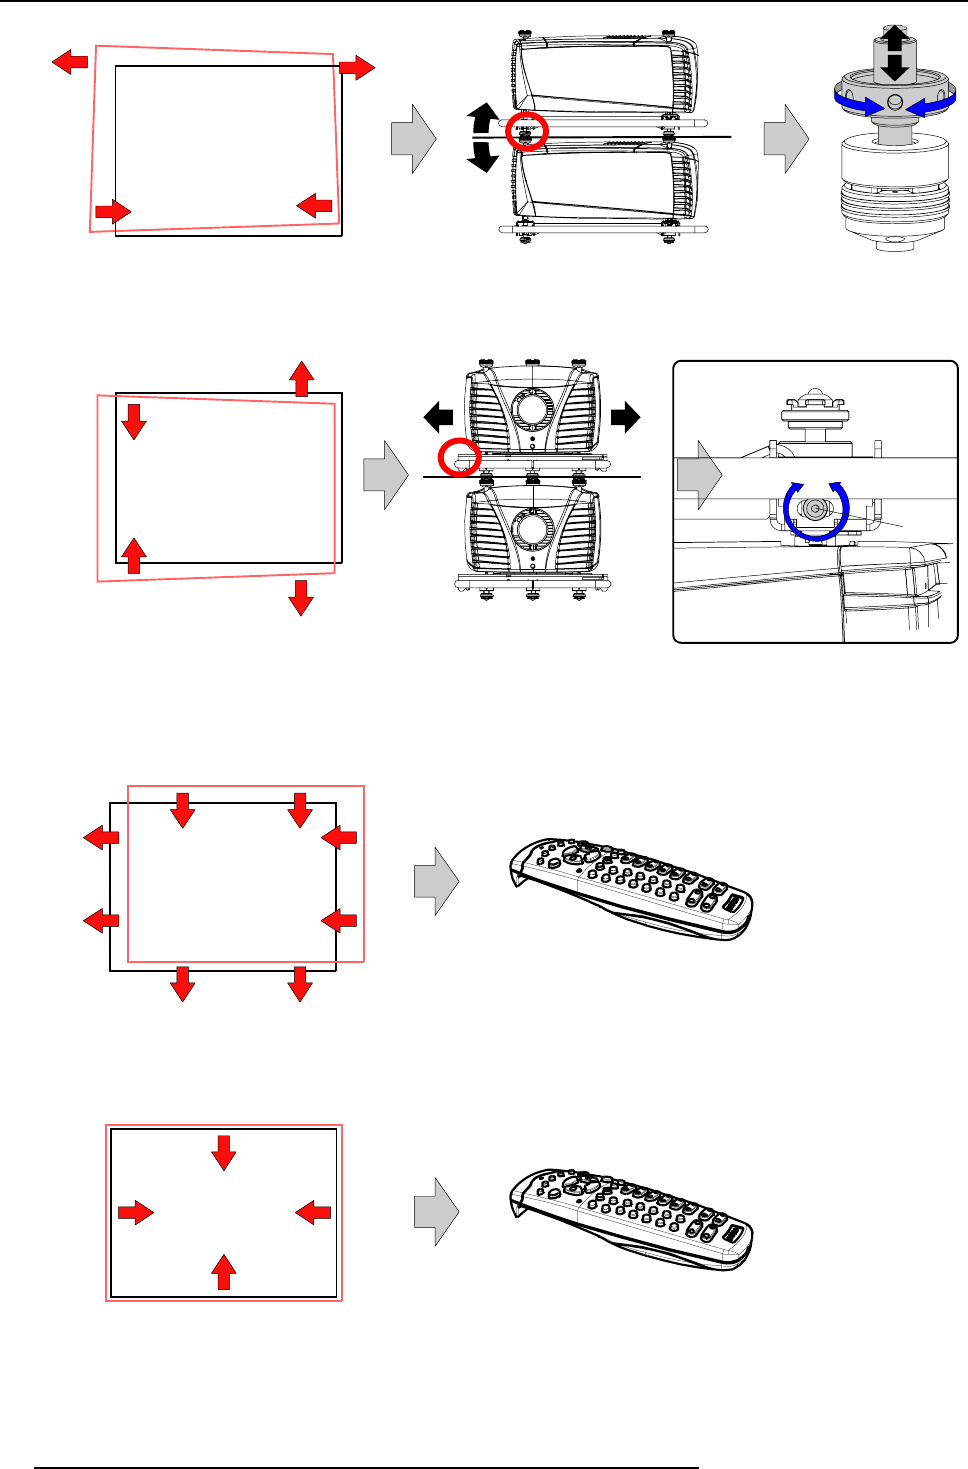
Inclination
Image 4-6
Inclination adjustment
5. If necessary, adjust the skew of the stacked projector with respect to the reference projector by turning the screw on the right
front side. Adjust until the outline of the hatch pattern is most symmetric with the reference hatch pattern.
Skew
Q
Image 4-7
Skew adjustment
6. Shift the hatch pattern horizontally and vertically until the outline of the hatch pattern is most symmetrically placed with respect
to the reference hatch pattern.
Note: Note that the “Shift” function is motorized, which means that you have to access the projector software, via the local
keypad or remote control unit, to operate the “Shift” function.
Shift
Image 4-8
Shift adjustment
7. Zoom the hatch pattern in or out until the outline of the hatch pattern matches exactly the outline of the reference hatch pattern.
Note: Note that the “Zoom” function is motorized, which means that you have to access the projector software, via the local
keypad or remote control unit, to op
erate the “Zoom” function.
Zoom
Image 4-9
Zoom adjustment
34 R59770057 CLM HD8 15/03/2010


