9. Image menu
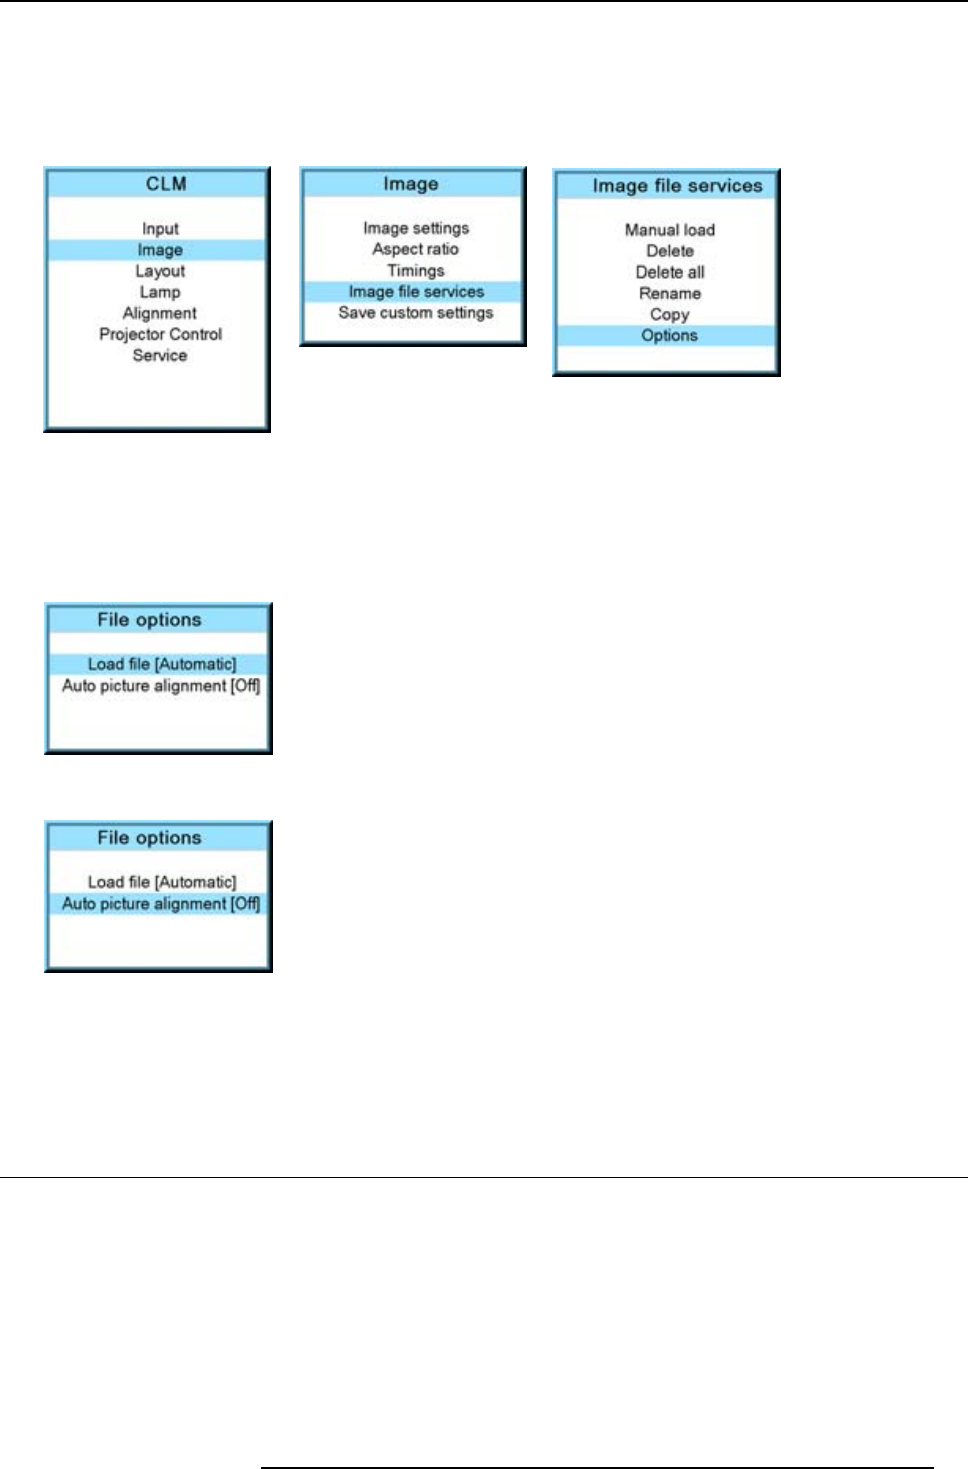
2. Use the ▲ or ▼ key to select Image and press ENTER.
3. Use the ▲ or ▼ key to select Image services and press ENTER.
The Image service menu is displayed.
4. Use the ▲ or ▼ key to select Options and press ENTER.
Image 9-105
Image 9-106
Image 9-107
The options window opens.
5. Use the ▲ or ▼ key to select Load file and press ENTER to toggle between [Automatic], [Manual] and [Custom only].
- [Automatic]: correct file will be loaded automatically.
- [Manual]: correct file has to be loaded manually.
- [Custom only]: correct file will be loaded automatically out of the available custom files.
Image 9-108
6. Use the ▲ or ▼ key to select Auto picture alignment and press ENTER to toggle between [Off], [Always] and [File load].
Image 9-109
- [Off]: no auto picture alignment activated.
- [Always]: always auto picture alignment activated. When sync disappears and comes back, an auto picture alignment is
executed.
- [Load file]: auto picture alignment executed each time a new file is loaded.
9.7 Save custom settings
What is done?
The current custom settings can be saved to the internal backup device in the same way as it would be done when the projector
was switched to standby.
How to save
1. Press MENU to activate the menus.
2. Use the ▲ or ▼ key to select Image and press ENTER.
3. Use the ▲ or ▼ key to select Save custom settings and press ENTER.
R59770057 CLM HD8 15/03/2010
93


