


Brocade MLX Series and Brocade NetIron XMR Hardware Installation Guide 365
53-1002373-02
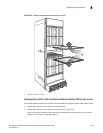
Replacing fan assemblies
8
Replacing the fan tray assembly in 4-slot and 8-slot routers
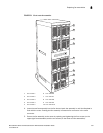
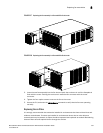
The fan tray assembly on Brocade MLX and Brocade NetIron XMR 4-slot and 8-slot routers is
accessible from the front of the device. Fan tray assemblies for Brocade MLXe 4-slot and 8-slot
routers are accessible from the back of the device.
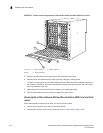
You can remove and replace a fan tray assembly while the router is powered on and running.
To replace a fan tray assembly, have these items available:
• A new fan tray assembly, which you can order from Brocade.
• An ESD wrist strap with a plug for connection to the ESD connector on the router.
DANGER
For safety reasons, the ESD wrist strap should contain a 1 megohm series resistor.
NOTE
If you did not remove the extra shipment screws from the router during installation, you will not be
able to remove the fan tray assembly. You will need to remove the router from the rack to remove
the shipping screws, (refer to the installation chapter appropriate for your router model) before you
can remove the fan tray assembly.
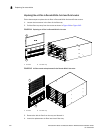
Follow these steps to replace fan tray assemblies in 4-slot routers.
1. Put on the ESD wrist strap and ground yourself by inserting the plug into the ESD connector on
the router.
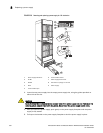
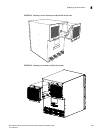
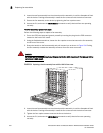
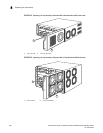
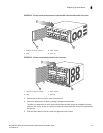
2. To remove the fan tray assembly from the router, push down on the latch release with your
thumb, grasp the handle, and pull it toward you as shown in Figure 235, Figure 236,
Figure 237 and Figure 238. Pulling the assembly unseats the fan tray assembly connector
from a router connector.
DANGER
Be careful not to insert your fingers into the fan while removing it. The fan may still be spinning at
a high speed.