5-95
Confidential
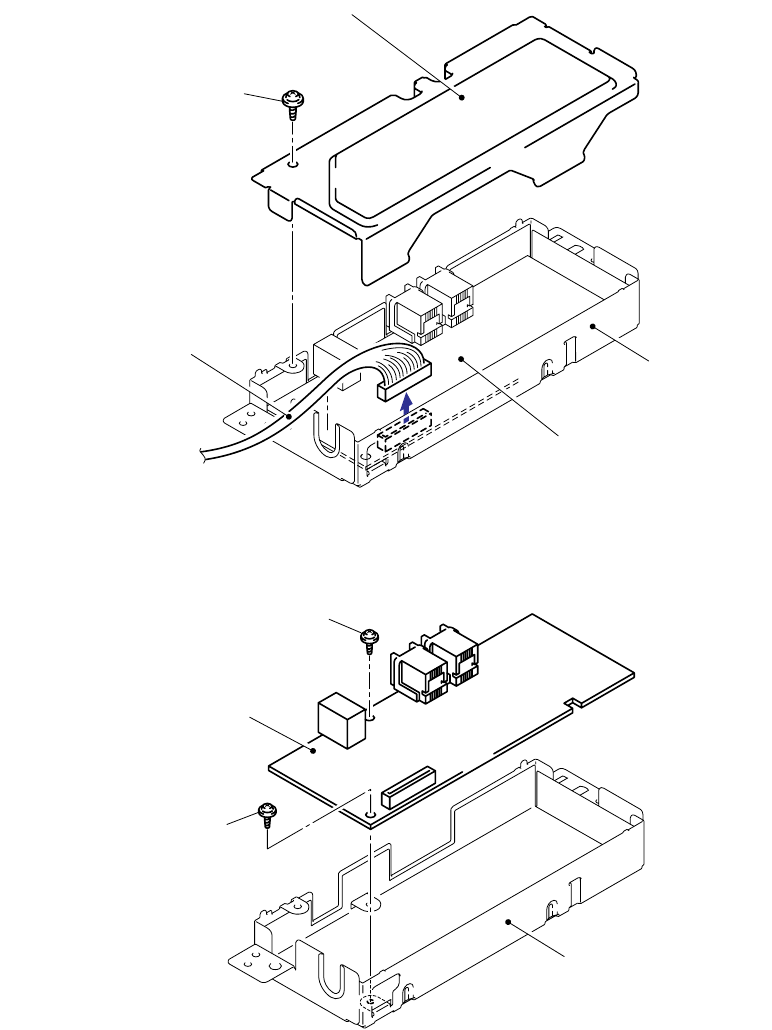
(4) Remove the Screw pan (S/P washer) M3.5x6 screw, and then remove the NCU shield
cover.
(5) Disconnect the connector of the NCU harness.
Fig. 5-119
(6) Remove the two cup S M3x6 Taptite screws, and then remove the NCU PCB ASSY.
Fig. 5-120
NCU shield cover
Screw, pan (S/P washer) M3.5X6
NCU harness
NCU PCB ASSY
NCU shield plate
Taptite cup S M3x6
Taptite cup S M3x6
NCU PCB ASSY
NCU shield plate


