


11-11
Cisco ME 3400 Ethernet Access Switch Software Configuration Guide
OL-9639-06
Chapter 11 Configuring VLANs
Creating and Modifying VLANs
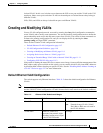
Assigning Static-Access Ports to a VLAN
You can assign a static-access port to a VLAN.
Note If you assign an interface to a VLAN that does not exist, the new VLAN is created. (See the “Creating
or Modifying an Ethernet VLAN” section on page 11-9.)
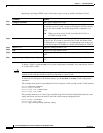
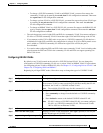
Beginning in privileged EXEC mode, follow these steps to assign a port to a VLAN in the VLAN
database:
To return an interface to its default configuration, use the default interface interface-id interface
configuration command.
This example shows how to configure a port as an access port in VLAN 2:
Switch# configure terminal
Enter configuration commands, one per line. End with CNTL/Z.
Switch(config)# interface fastethernet0/1
Switch(config-if)# switchport mode access
Switch(config-if)# switchport access vlan 2
Switch(config-if)# end
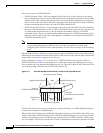
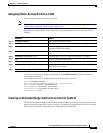
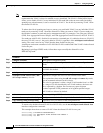
Creating an Extended-Range VLAN with an Internal VLAN ID
If you enter an extended-range VLAN ID that is already assigned to an internal VLAN, an error message
appears, and the extended-range VLAN is rejected. To manually release an internal VLAN ID, you must
temporarily shut down the routed port that is using the internal VLAN ID.
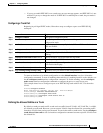
Command Purpose
Step 1
configure terminal Enter global configuration mode
Step 2
interface interface-id Enter the interface to be added to the VLAN.
Step 3
no shutdown Enable the port, if necessary. By default, UNIs and ENIs are
disabled, and NNIs are enabled.
Step 4
switchport mode access Define the VLAN membership mode for the port (Layer 2 access
port).
Step 5
switchport access vlan vlan-id Assign the port to a VLAN. Valid VLAN IDs are 1 to 4094.
Step 6
end Return to privileged EXEC mode.
Step 7
show running-config interface interface-id Verify the VLAN membership mode of the interface.
Step 8
show interfaces interface-id switchport Verify your entries in the Administrative Mode and the Access Mode
VLAN fields of the display.
Step 9
copy running-config startup-config (Optional) Save your entries in the configuration file.