


33-46
Cisco ME 3400 Ethernet Access Switch Software Configuration Guide
OL-9639-06
Chapter 33 Configuring QoS
Configuring QoS
Use the no form of the appropriate command to delete a policy map or table map or remove an assigned
CoS, DSCP, precedence, or QoS-group value.
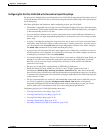
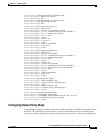
This example uses a policy map to remark a packet. The first marking (the set command) applies to the
QoS default class map that matches all traffic not matched by class AF31-AF33 and sets all traffic to an
IP DSCP value of 1. The second marking sets the traffic in classes AF31 to AF33 to an IP DSCP of 3.
Switch(config)# policy-map Example
Switch(config-pmap)# class class-default
Switch(config-pmap-c)# set ip dscp 1
Switch(config-pmap-c)# exit
Switch(config-pmap)# class AF31-AF33
Switch(config-pmap-c)# set ip dscp 3
Switch(config-pmap-c)# exit
Switch(config-pmap)# exit
Switch(config)# interface fastethernet0/1
Switch(config-if)# service-policy input Example
Switch(config-if)# exit
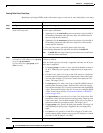
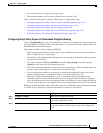
Step 4
set qos-group value
and/or
set cos {cos_value | cos [table
table-map-name] | dscp [table
table-map-name] | precedence [table
table-map-name]}
and/or
set [ip] dscp {dscp_value | cos [table
table-map-name] | dscp [table
table-map-name] | precedence [table
table-map-name]}
and/or
set [ip] precedence {precedence_value |
cos [table table-map-name] | dscp [table
table-map-name] | precedence [table
table-map-name]}
Mark traffic by setting a new value in the packet, specifying a table map,
or specifying a QoS group.
• For qos-group value, identify a QoS group to be used at egress to
identify specific packets. The range is from 0 to 99.
• For cos cos_value, enter a new CoS value to be assigned to the
classified traffic. The range is 0 to 7.
• For [ip] dscp new-dscp, enter a new DSCP value to be assigned to
the classified traffic. The range is 0 to 63.
• For [ip] precedence new-precedence, enter a new IP-precedence
value to be assigned to the classified traffic. The range is 0 to 7.
• You can also configure a CoS, DSCP, or IP precedence table and
optionally enter the table name. If you do not enter table table-map
name, the table map default behavior is copy. See the
“Configuring
Table Maps” section on page 33-36.
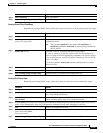
Step 5
exit Return to policy-map configuration mode.
Step 6
exit Return to global configuration mode.
Step 7
interface interface-id Enter interface configuration mode for the interface to which you want to
attach the policy.
Step 8
service-policy input policy-map-name Attach the policy map (created in Step 2) to the ingress interface.
Step 9
end Return to privileged EXEC mode.
Step 10
show policy-map [policy-map-name
[class class-map-name]]
Verify your entries.
Step 11
copy running-config startup-config (Optional) Save your entries in the configuration file.
Command Purpose