33-58
Cisco ME 3400 Ethernet Access Switch Software Configuration Guide
OL-9639-06
Chapter 33 Configuring QoS
Configuring QoS
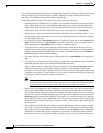
After you have created an output policy map, you attach it to an egress port. See the “Attaching a Traffic
Policy to an Interface” section on page 33-37.
Use the no form of the appropriate command to delete an existing policy map or class map or to cancel
strict priority queuing for the priority class or the bandwidth setting for the other classes.
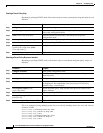
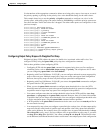
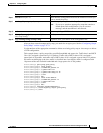
This example shows how to configure the class out-class1 as a strict priority queue so that all packets in
that class are sent before any other class of traffic. Other traffic queues are configured so that out-class-2
gets 50 percent of the remaining bandwidth and out-class3 gets 20 percent of the remaining bandwidth.
The class class-default receives the remaining 30 percent with no guarantees.
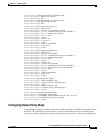
Switch(config)# policy-map policy1
Switch(config-pmap)# class out-class1
Switch(config-pmap-c)# priority
Switch(config-pmap-c)# exit
Switch(config-pmap)# class out-class2
Switch(config-pmap-c)# bandwidth remaining percent 50
Switch(config-pmap-c)# exit
Switch(config-pmap)# class out-class3
Switch(config-pmap-c)# bandwidth remaining percent 20
Switch(config-pmap-c)# exit
Switch(config-pmap)# exit
Switch(config)# interface gigabitethernet0/1
Switch(config-if)# service-policy output policy1
Switch(config-if)# exit
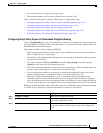
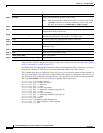
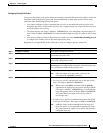
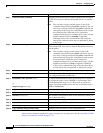
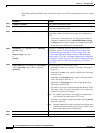
Step 5
priority Set the strict scheduling priority for this class.
Note Only one unique class map on the switch can be associated with
a priority command. You cannot configure priority along with
any other queuing action (bandwidth or shape average).
Step 6
exit Exit policy-map class configuration mode for the priority class.
Step 7
class class-map-name Enter the name of a nonpriority class, and enter policy-map class
configuration mode for that class.
Step 8
bandwidth remaining percent value Set output bandwidth limits for the policy-map class as a percentage of
the remaining bandwidth. The range is 1 to 100
percent.
Step 9
exit Exit policy-map class configuration mode for the class
Step 10
exit Return to global configuration mode.
Step 11
interface interface-id Enter interface configuration mode for the interface to which you want to
attach the policy.
Step 12
service-policy output policy-map-name Attach the policy map (created in Step 3) to the egress interface.
Step 13
end Return to privileged EXEC mode.
Step 14
show policy-map Verify your entries.
Step 15
copy running-config startup-config (Optional) Save your entries in the configuration file.
Command Purpose


