


18-10
Cisco ME 3400 Ethernet Access Switch Software Configuration Guide
OL-9639-06
Chapter 18 Configuring Flex Links and the MAC Address-Table Move Update Feature
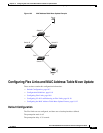
Configuring Flex Links and MAC Address-Table Move Update
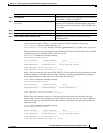
This example shows how to configure the preemption mode as forced for a backup interface pair and to
verify the configuration:
Switch# configure terminal
Switch(conf)# interface gigabitethernet0/1
Switch(conf-if)# switchport backup interface gigabitethernet0/2 preemption mode forced
Switch(conf-if)# switchport backup interface gigabitethernet0/2 preemption delay 50
Switch(conf-if)# end
Switch# show interface switchport backup detail
Active Interface Backup Interface State
------------------------------------------------------------------------
GigabitEthernet0/21 GigabitEthernet0/2 Active Up/Backup Standby
Interface Pair : Gi0/1, Gi0/2
Preemption Mode : forced
Preemption Delay : 50 seconds
Bandwidth : 100000 Kbit (Gi0/1), 100000 Kbit (Gi0/2)
Mac Address Move Update Vlan : auto
Configuring VLAN Load Balancing on Flex Links
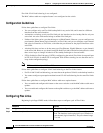
Beginning in privileged EXEC mode, follow these steps to configure VLAN load balancing on Flex
Links:
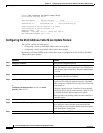
Step 5
switchport backup interface interface-id preemption
mode {forced | bandwidth | off}
Configure a preemption mechanism and delay for a Flex
Link interface pair. You can configure the preemption as:
• forced—the active interface always preempts the
backup.
• bandwidth—the interface with the higher bandwidth
always acts as the active interface.
• off—no preemption happens from active to backup.
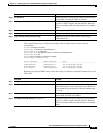
Step 6
switchport backup interface interface-id preemption
delay delay-time
Configure the time delay until a port preempts another
port.
Note Setting a delay time only works with forced and
bandwidth modes.
Step 7
end Return to privileged EXEC mode.
Step 8
show interface [interface-id] switchport backup Verify the configuration.
Step 9
copy running-config startup config (Optional) Save your entries in the switch startup
configuration file.
Command Purpose
Command Purpose
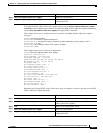
Step 1
configure terminal Enter global configuration mode.
Step 2
interface interface-id Specify the interface, and enter interface configuration
mode. The interface can be a physical Layer 2 interface or
a port channel (logical interface). The port-channel range
is 1 to 48.