88 Installing System Components
Installing the Power Supply Fan Assembly
1
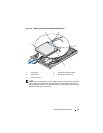
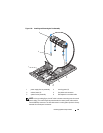
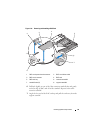
Connect the fan’s power cable to the FAN_MOD connector on the power
distribution board. See Figure 3-11 for the location of the connector.
2
Route the fan cable through the slot on the shroud partition.
3
Close the power distribution board cover by rotating it downward until it
seats directly over the board.
4
Close the system. See "Opening and Closing the System" on page 68.
Power Supplies
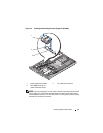
Your system supports one or two power supplies rated at an output of 400 W.
If only one power supply is installed, it must be installed in the left power
supply bay (PS1). If two power supplies are installed, the second power supply
provides hot-pluggable, power redundancy. In redundant mode, the system
distributes the power load across both power supplies to maximize efficiency.
When a power supply is removed with the system powered on, the full power
load is picked up by the remaining power supply.
NOTICE: To ensure proper system cooling, the power supply blank must be
installed on the unoccupied power supply bay in a nonredundant configuration.
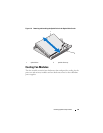
Removing a Power Supply
NOTICE: The system requires one power supply to operate the system normally. On
power-redundant systems, remove and replace only one power supply at a time in a
system that is powered on.
NOTE: On your rack system, you may have to unlatch and lift the optional cable
management arm if it interferes with power supply removal. For information about
the cable management arm, see the system’s Rack Installation Guide.
1
If your system has a single power supply, turn off the system and all
attached peripherals. For a redundant system, you can leave the system
running and proceed to the next step.
2
Disconnect the power cable from the power source.
3
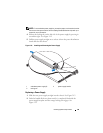
Disconnect the power cable from the power supply and remove the Velcro
straps that bundle and secure the system cables.


