Removing the Drive's Mounting Frames
If there are mounting frames attached to a drive you want to
install, you may need to remove them before you can install the
drive. If you are installing a 3.5-inch drive in the 3.5-inch drive
carrier or a 5.25-inch drive in the 5.25-inch drive bay, you need
to remove any drive mounting frames so the drive will fit.
However, if you are installing a 3.5-inch drive in the 5.25-inch
drive bay, leave the mounting frames on the drive.
Follow these steps to remove a drive’s mounting frames:
1.
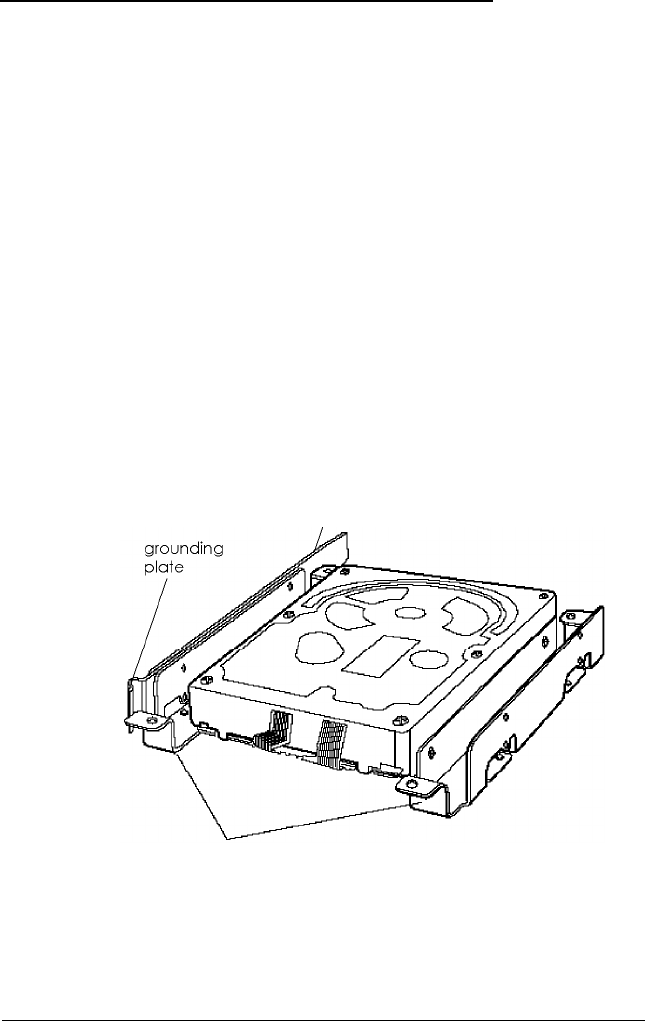
On your drive, there may be a plastic guiderail and metal
grounding plate attached to one of the mounting frames. If
so, remove the screws securing them to the mounting
frame and remove the guiderail and grounding plate.
guiderail
I
mounting frames
2.
Then remove the two screws securing each mounting frame
to the drive and remove the frames.
Installing and Removing Drives
5-3


