


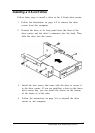


5.
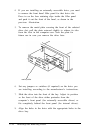
Remove the screws securing the drive to the drive bay
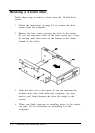
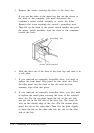
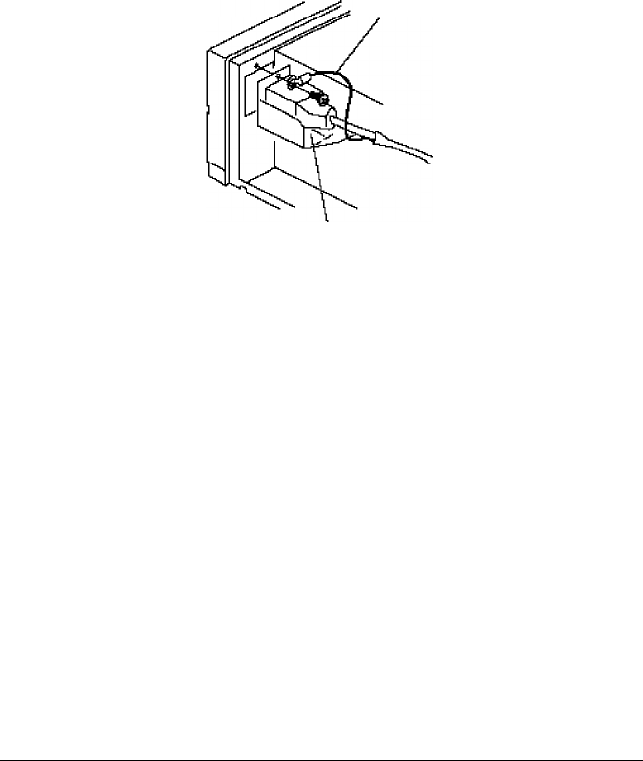
If you use the holes in the upper bay that are the closest to
the front of the computer, you must disconnect the
computer’s power switch assembly to access the holes.
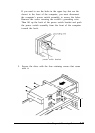
Remove the screw securing the switch’s grounding wire.
Then lift up the back of the power switch bracket and push
the power switch assembly from the front of the computer
toward the back.
grounding wire
power switch
bracket
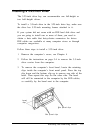
6.
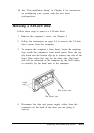
Slide the drive out of the front of the drive bay and store it in
a safe place.
7.
If you removed an externally accessible drive, you need to
replace the front bezel filler panel for that drive slot. Press
the filler panel into the front of the slot until the four
retaining clips click into place.
8.
If you removed an externally accessible drive, you also need
to replace the metal plate covering the front of the selected
drive slot. For the top plate, insert the tab on the left side
into the slot in the left side of the drive bay. The lower tab
rests on the outside edge of the slot. (For the bottom plate,
insert the tab on the right side.) Then flex the plate slightly
to insert the tab on the other side into the slot on the other
side of the bay.
5-14 Installing and Removing Drives