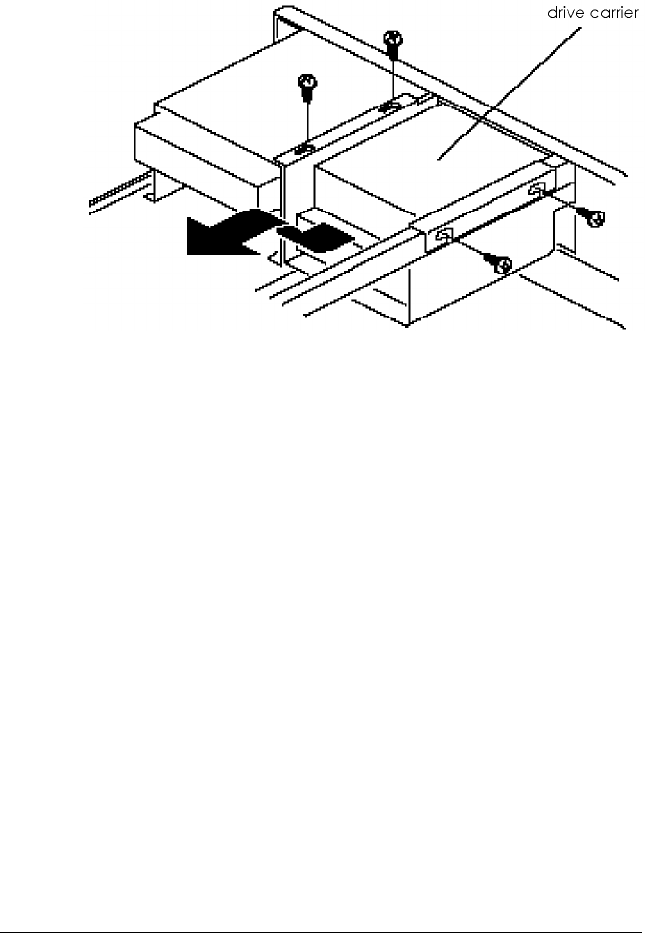
4.
Remove the four screws securing the drive carrier to the
computer.
5.
Slide the drive carrier toward the computer’s back panel.
Then lift up the back of the carrier and pull it out of the
computer at an approximately 45 degree angle.
If you are going to install a drive in the 3.5-inch drive carrier,
see page 5-7; if you are going to remove a 3.5-inch drive, see
page 5-8.
If you removed the carrier to install or remove a 5.25-inch
drive, return to the instructions you have been following.
If you removed the carrier to install or remove SIMMs, see
Chapter 4 for additional instructions.
Installing and Removing Drives
5-5


