S e c t i o n F o u r
128
MIDI/JOYSTICK DEVICES
To connect a MIDI/Joystick Device:
(MIDI/joystick devices are installed on the LAN
Enhancement Unit,there is no port on your
notebook itself.)
1. Close all files and exit all applications.
2. Turn off power to your notebook, close
the display and remove the AC adapter.
(See pages 14-15 for more information.)
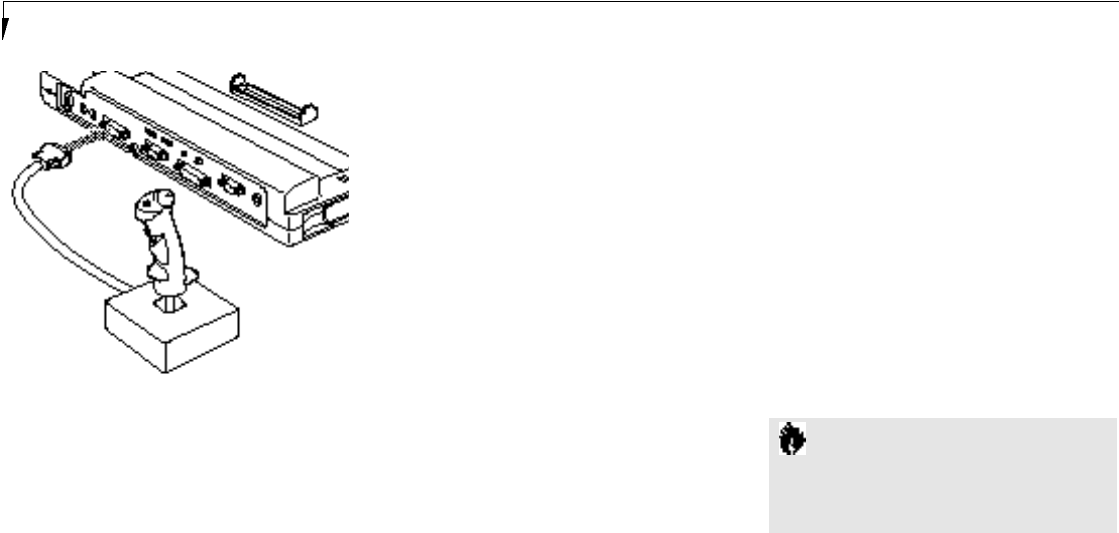
3. Align the connector of the MIDI device
with the connector towards the body of your
LAN Enhancement Unit. (Figure 4-11.)
4.
In s ert the con n ector firm ly into the port on
your LAN Enhancem ent Unit until it is seated .
5. Tighten the screw locks on both sides
of the connector.
To disconnect a MIDI/Joystick Device:
1. Close all files and exit all applications
2. Turn off power to your notebook, close
the display and remove the AC adapter.
(See pages 14-15 for more information.)
3. Unscrew the screw locks on both sides of the
MIDI/joystick device connector next to the
body of your LAN Enhancement Unit.
(Figure 4-11.)
4. Pull the connector free.
MOUSE
Make sure the connector on your device is
the correct PS/2 type. Align the arrow on the
connector to point to the bottom of your note-
book and push it in until the connector seats in
the port on the rear panel of your notebook or
of the LAN Enhancement Unit.A mouse may
be installed and will be automatically recog-
nized by your notebook without restarting or
changing setups. (See Figure 1-8 on page 7.)
Remember, on the LAN Enhancement Unit,
a mouse may only be installed in the mouse
port and a keyboard or numeric keypad in
the keyboard port, either may be installed in
the port of your notebook.
Figure 4-11 Installing a MIDI/Joystick Device
C A U T I O N
On the LAN Enhancement Unit a mouse
will not be recognized if it is installed on
the keyboard port and vice versa.


