


3-6 Service Manual
5055-01x
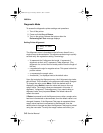
Diagnostic Mode
To access the diagnostics printer settings and operations:
1. Turn off the printer.
2. Press and hold Go and Return.
3. Turn on the printer. Release the buttons after the
Performing Self Test message displays.
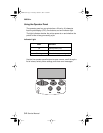
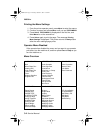
Setting Printer Alignment
The Alignment menu is formatted so that all menu items fit on a
single screen as shown below. This allows manufacturing to quickly
set and verify the registration setting. Terminology:
• X represents the X alignment horizontal, Y represents Y
alignment vertical, and T represents Theta alignment. (The
alignment of a curve of the horizontal position over the length of
the line).
• s represents the sign for negative values. This space is blank for
positive values.
• xx represents the margin value.
• An asterisk (*) is displayed next to the default value.
Upon first entering the Alignment menu, the X alignment sign/value
pair will flash. This indicates it is the alignment value being changed.
To change the value, press Menu. Once the desired value is
displayed, press Select to save the value and move to the next
margin value. The margin values are traversed in this order: X
alignment, Y alignment, Theta alignment. If you need to skip an
alignment value, then just press Select. The default value will
remain the same.
If Return is pressed to exit the Alignment menu after a margin value
has been incremented or decremented, then the default value is not
changed. However, if the Alignment Test page is requested after a
margin value has been incremented or decremented, then the
default value is changed and then the Alignment Test page is printed
using the new value. To verify the margin values are correct, you
X= sxxx* Y= sxxx*
T= sxx*
Service.bk Page 6 Thursday, October 4, 2001 12:20 PM