


General Information 1-1
5055-01x
1. General Information
Maintenance Approach
The diagnostic information in this manual leads you to the correct
field replaceable unit (FRU) or part. Use the error code charts,
symptom index, and service checks to determine the symptom and
repair the failure. The removals in the Repair Information chapter
may help you identify parts.
After you complete the repair, perform tests as needed to verify the
repair.
Standard Inspection and Cleaning Procedure
• Switch off Printer power, and disconnect the AC power cord
from the wall outlet.
• Remove and inspect the photodevelopers and toner cartridges,
shielding them from strong light.
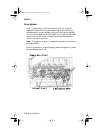
• Inspect the interior of the printer, removing foreign matter such
as paper clips, staples, pieces of paper/transparencies, paper
dust, hair, oil, grease or toner.
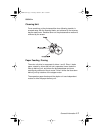
• Clean the printer interior using a lint-free cloth, dampened
slightly with cold water. Do not use solvents or chemical
cleaners to clean the printer interior.
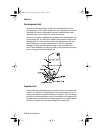
• Use only the specified oil or lubricant on printer parts (some
service parts are pre-lubed from the factory).
• Inspect and, if necessary, clean all rubber/plastic and D rollers
with A lint-free cloth, dampened slightly with cold water. Dry the
rollers with a lint-free cloth.
• While cleaning, inspect the interior of the printer for damaged
wires, loose connections, toner leakage, loose springs, and
damaged or worn parts.
• Be sure the printer is on a single, flat, strong table or desk top.
• Inspect all supplies (OCR, Cartridges, photodeveloper/toner
cartridges, belts, fuser CRUs) and paper sources (cassettes,
trays, feeders, duplex drawers, finishers, mailbox trays) for
obvious damage and proper installation (paper under corner
bucklers, paper guides not too tight) Inspect for correct media
usage (paper, transparencies, labels).
Service.bk Page 1 Thursday, October 4, 2001 12:20 PM