


Repair Information 4-27
4085-001
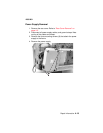
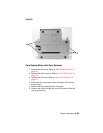
Frame From Base Removal
1. Remove all covers. Refer to “Rear Cover Removal” on page 4-3.
2. Remove the power supply. Refer to “Power Supply Removal” on
page 4-19.
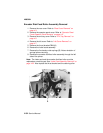
3. Remove the maintenance tank through the rear of the printer.
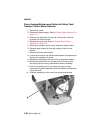
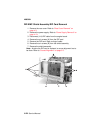
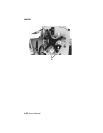
4. Disconnect (J2) the transport carrier motor from the engine
board.
5. Disconnect (J17) the paper port II from the engine board.
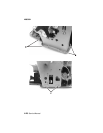
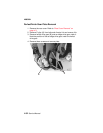
6. Disconnect the star wheel follower spring {A} from the base
assembly.
7. Remove the four screws {B} from the left side frame plate.
8. Remove the two screws {C} on the right side frame plate.
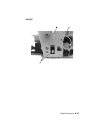
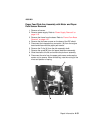
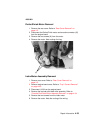
9. Before placing the printer on its back, remove the PerfectFinish
applicator to prevent spilling.
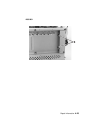
10. Place the printer on its back and remove five screws {D} from
the base.
11. Lift and slide the frame forward and remove.