


399
APPENDICES
A
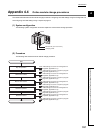
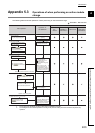
Appendix 4 Online Module Change Procedure (When Using GX Developer)
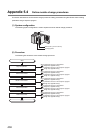
Appendix 4.6 When a sequence program was used for the initial setting
(From the previous page)
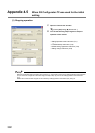
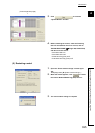
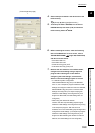
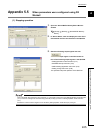
4. Set the data pre-recorded in the device test to the
buffer memory.
[Online] [Debug] [Device test...]
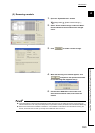
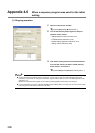
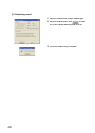
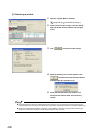
5. To back up the data in E
2
PROM, turn off and on
E
2
PROM backup instruction (Yn8) and write the
buffer memory data to E
2
PROM.
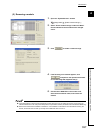
6. Before restarting the control, check the following
items of the Q64TCN. If an error occurs, refer to
TROUBLESHOOTING ( Page 359, CHAPTER 8)
and take corrective action.
• If the RUN LED is on.
• If the ERR. LED is off.
• If Write error flag (Xn2) is off.
• If Hardware error flag (Xn3) is off.
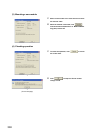
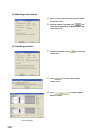
7. Because the new module is in the default status,
configure the initial settings using a sequence
program after restarting the control. Before
configuring the initial settings, check that the
details on the initial setting program are correct.
• In a standard system configuration
When Module READY flag (Xn0) in the Q64TCN
turns on, use a sequence program where the initial
settings are configured. When the control is restarted,
Module READY flag (Xn0) turns on and the initial
settings are configured. (In a sequence program
where the initial settings are configured only for a
single scan after RUN, the initial settings are not
configured.)
• When using the remote I/O network
Install a user device (initial setting request signal)
where the initial settings are configured at any timing
in the sequence program. After the control is
restarted, turn on the initial setting request signal and
configure the initial settings. (In a sequence program
where the initial settings are configured only for a
single scan after restarting the remote I/O network
data link, the initial settings are not configured.)