Chapter 3
Installation Overview
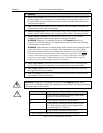
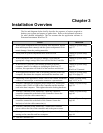
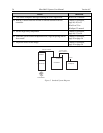
The list and diagrams below briefly describe the sequence of actions required to
hookup your system and prepare to gather data. Refer to the indicated references
for more detailed information. This list assumes that the application software is
Princeton Instruments WinView/32.
Action Reference
1. If the system components have not already been unpacked, unpack
them and inspect their carton(s) and the system components for in-
transit damage. Store the packing materials.
Chapter 4 System Setup,
page
27
2. Verify that all system components have been received. Chapter 4 System Setup,
page
27
3. If the components show no signs of damage, verify that the
appropriate voltage settings have been selected for the Controller.
Chapter 4 System Setup,
page
29
4. If WinView/32 software is not already installed in the host
computer, install it. In addition to installing the WinView/32
software, this operation will load all of the interface card drivers.
Chapter 4 System Setup,
page
30
WinView/32 manual
5. If the appropriate interface card is not already installed in the host
computer, shut down the computer and install the interface card.
Chapter 4 System Setup,
page
30 or page 32
6. Depending on the application, attach a lens to the camera, mount the
camera to a microscope, or mount the camera to a spectrometer.
Chapter 4 System Setup,
page
34, 35, or 38
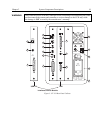
7. With the Controller and computer power turned OFF, connect the
interface cable (TAXI or USB) to the Controller and the interface
card in the host computer. Then tighten down the locking hardware.
Chapter 4 System Setup,
page
39
8. With the Controller power turned OFF, make the camera-to-
controller connections to the back of the Controller. Secure the
latch(es) to lock the cable connection(s).
Chapter 4 System Setup,
page
40
9. With the Controller power turned OFF, make the camera-to-
controller connections to the back of the Camera. Secure the
latch(es) to lock the cable connection(s).
Chapter 4 System Setup,
page
40
10. With the Controller power turned OFF, connect the Controller
power cable to the rear of the controller and to the power source.
11. If using a microscope Xenon or an Hg arc lamp, turn it on before
turning on the controller and host computer.
Chapter 5 Operation,
page
44
12. Turn the Controller ON.
25


