Chapter 8: Device Management
192
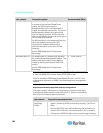
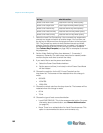
Hot key:
Take this action:
Double Click Num Lock
Press Num Lock key twice quickly
Double Click Caps Lock
Press Caps Lock key twice quickly
Double Click Left Alt key
Press the left Alt key twice quickly
Double Click Left Shift key
Press the left Shift key twice quickly
Double Click Left Ctrl key
Press the left Ctrl key twice quickly
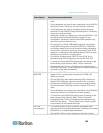
7. Select the Local Port Connect key. Use a connect key sequence to
connect to a target and switch to another target. You can then use
the hot key to disconnect from the target and return to the local port
GUI. The connect key works for both standard servers and blade
chassis. Once the local port connect key is created, it will appear in
the Navigation panel of the GUI so you can use it as a reference.
See Connect Key Examples (on page 249) for examples of connect
key sequences.
8. Set the Video Switching Delay from between 0 - 5 seconds, if
necessary. Generally 0 is used unless more time is needed (certain
monitors require more time to switch the video).
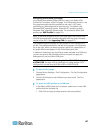
9. If you would like to use the power save feature.
a. Select the Power Save Mode checkbox.
b. Set the amount of time (in minutes) in which Power Save Mode
will be initiated.
10. Choose the resolution for the KX II Local Console from the
drop-down list. The browser will be restarted when this change is
made.
800x600
1024x768
1280x1024
11. Choose the refresh rate from the drop-down list. The browser will be
restarted when this change is made.
60 Hz
75 Hz
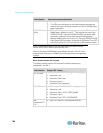
12. Choose the type of local user authentication.
Local/LDAP/RADIUS. This is the recommended option. For more
information about authentication, see Remote Authentication
(on page 34).
None. There is no authentication for Local Console access. This
option is recommended for secure environments only.


