


Chapter 4 Maintaining the Sun Fire V40z Server 4-37
Caution – When you replace the rear fan-cage assembly, make sure that the
fan-cage connector engages fully with the motherboard connector. It is possible to
power on the server with the fan cage not connected to the motherboard. When you
power on the server, ensure that all fans are spinning and that the fan LEDs are on.
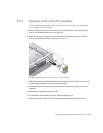
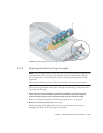
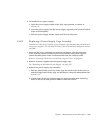
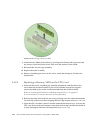
8. Align the fan cage with the chassis and push down on both ends of the fan cage
until both retaining clips click securely into place and the fan-cage connector fully
engages with the motherboard connector.
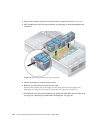
9. Power on the server before you replace the cover so that you can verify that all
fans are spinning and that the fan LEDs are on.
If the fans are not spinning, it is very important that you power off the server and
reseat the fan cage so that the motherboard connector is fully engaged.
10. Before re-installing the cover on the server, check the routing of all cables for
obstructions.
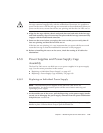
4.5.8 Power Supplies and Power-Supply Cage
Assembly
The Sun Fire V40z server can hold one or two power supplies in its power-supply
cage. Use the correct procedure in this section:
■ “Replacing an Individual Power Supply” on page 4-37
■ “Replacing a Power-Supply Cage Assembly” on page 4-39
4.5.8.1 Replacing an Individual Power Supply
Note – The individual power supplies on the Sun Fire V40z server are
hot-swappable. You do not need to power off the server before removing and
replacing a power supply.
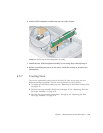
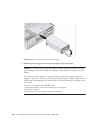
1. At the outside rear of the server, pull the finger-ring on the power-supply handle
toward you to disengage the power-supply connector from the power distribution
backplane (see
FIGURE 4-26).
Note – A twisted, plastic tie-wrap through the finger ring holds the power-supply
handle in place. Untwist this tie-wrap to pull the handle out.