


Chapter 4 Maintaining the Sun Fire V40z Server 4-51
4.5.11.2 Replacing a Memory Module on the Motherboard
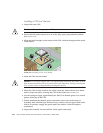
1. Power off the server, including any attached peripherals, and disconnect the
server from the electrical outlet. If your server includes two power supplies,
ensure that both power cords are disconnected from the electrical outlet.
Refer to “Powering Off the Server and Removing the Cover” on page 4-2.
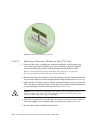
2. Remove the main air baffle (see
FIGURE 4-20).
Lift the rear edge of the baffle, then move it toward the rear of the server to
disengage the hooks on the front edge of the baffle.
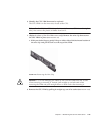
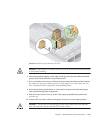
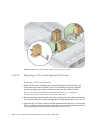
3. Remove the rear fan-cage assembly. Squeeze the retainer clips on each end of the
fan cage inward (see
FIGURE 4-25).
4. Pull straight up on the fan-cage assembly to disengage it from the motherboard
connector.
5. Lift the assembly up and out of the server.
6. Locate the memory-module connector in which you will install or replace a
memory module.
Note – For the memory modules next to CPU1 (from the front of the server, CPU1 is
on the right side), first remove fan 12 and the plastic air baffle to obtain easier access
to the ejector bars.
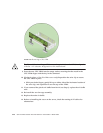
7. Remove a memory module by pressing down on the ejector bars at both ends of
the memory module’s socket (see
FIGURE 4-31).
8. Ensure that the memory-module socket’s ejector bars are open (rotated outward) to
allow the new module to be inserted.
9. Align the memory module’s edge connector with the alignment key and insert the
memory module into the connector.
10. If you removed fan 12 and the plastic air baffle (see Step 6), replace the fan and
plastic air baffle now.
11. Re-install the rear fan-cage assembly.
12. Replace the main air baffle.
13. Before re-installing the cover on the server, check the routing of all cables for
obstructions.