4-62 Sun Fire V20z and Sun Fire V40z Servers—User Guide • March 2005
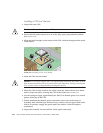
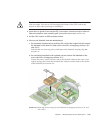
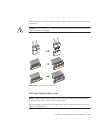
9. Carefully position the heatsink on the CPU, aligning it with the mounting posts to
reduce movement after it makes initial contact with the layer of thermal grease.
Caution – If the heatsink is moved too much during its installation, the layer of
thermal grease may become uneven, leading to component damage.
10. According to the type of heatsink that you have, after the heatsink is correctly
aligned:
a. Re-install the heatsink clips so that the longer tab points toward the fans.
b. Tighten the clip-securing screws.
OR
Caution – Tighten the screws evenly on each side of the heatsink. If you completely
tighten the screw on one side first, you may damage the CPU underneath.
a. Re-insert the screws and and captive springs.
b. Tighten the screws.
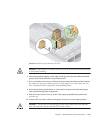
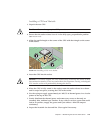
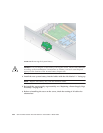
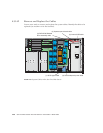
11. Replace the CPU card into the server (see
FIGURE 4-18):
a. Carefully align the rear corners of the CPU card with the plastic alignment
tracks inside the server chassis, then slide the CPU card into the tracks.
b. Press in firmly and evenly on both corners of the CPU card until it engages the
backplane.
c. Lock down the two plastic latches on the corners of the CPU card to secure it in
place.
12. Close the CPU card door.
13. Replace the front bezel onto the server.


