GT-782
6. Maintenance
74
6-1-3. Loading / Retrieving White Ink
Do not leave the White ink inside the printer. White pigment precipitates and may cause serious damage to your printer.
Before you start your job, retrieve the White Ink, shake the cartridges for 30 seconds to 1 minutes, and the load the White Ink
again to start your printing. Clean the tubes once a week with Maintenance Solution. Load the white ink again when you start
the print job.
Retrieving White ink:
(1) Press the OK Button on the right Control Panel and show the Menu.
(2) Press the Up/Down Button to select the “White Retrieval”, and then press the OK Button.
(3) Make sure that four White Ink Cartridges are installed. Press OK button and White Ink Retrieval starts.( it takes 5
minutes).
(4) When finished, "Standby" (no print data) or "Ready" (with print data) indicates on the Display.
Shaking White Ink:
(1) Hold the White Ink Cartridge upside down with a hand.
(2) Shake the cartridge horizontally and rather slowly so that the White Ink inside can move upside-down. Shake it for 30
seconds to one minute. Shake the cartridge longer (for about 2 minutes) if it has been left for a week or more or the
consumption date is coming.
<Note>
Even if you use an automatic shaker, shake by hand horizontally and widely after shaking by the machine.
Loading White Ink:
(1) Install White Ink Cartridges (once shaken is completed).
(2) Press the OK Button on the right Control Panel and show the Menu.
(3) Select "Load White". Select "All White" to do in one time or select the each Print Head to do one by one. Press OK button
and White Ink loading starts.
(4) When finished, "Standby" (no print data) or "Ready" (with print data) indicates on the Display.
Tube Cleaning (White, once a week) :
(1) Confirm in advance the amount of the Waste Ink in the Waste Ink Tank when you do the maintenance.
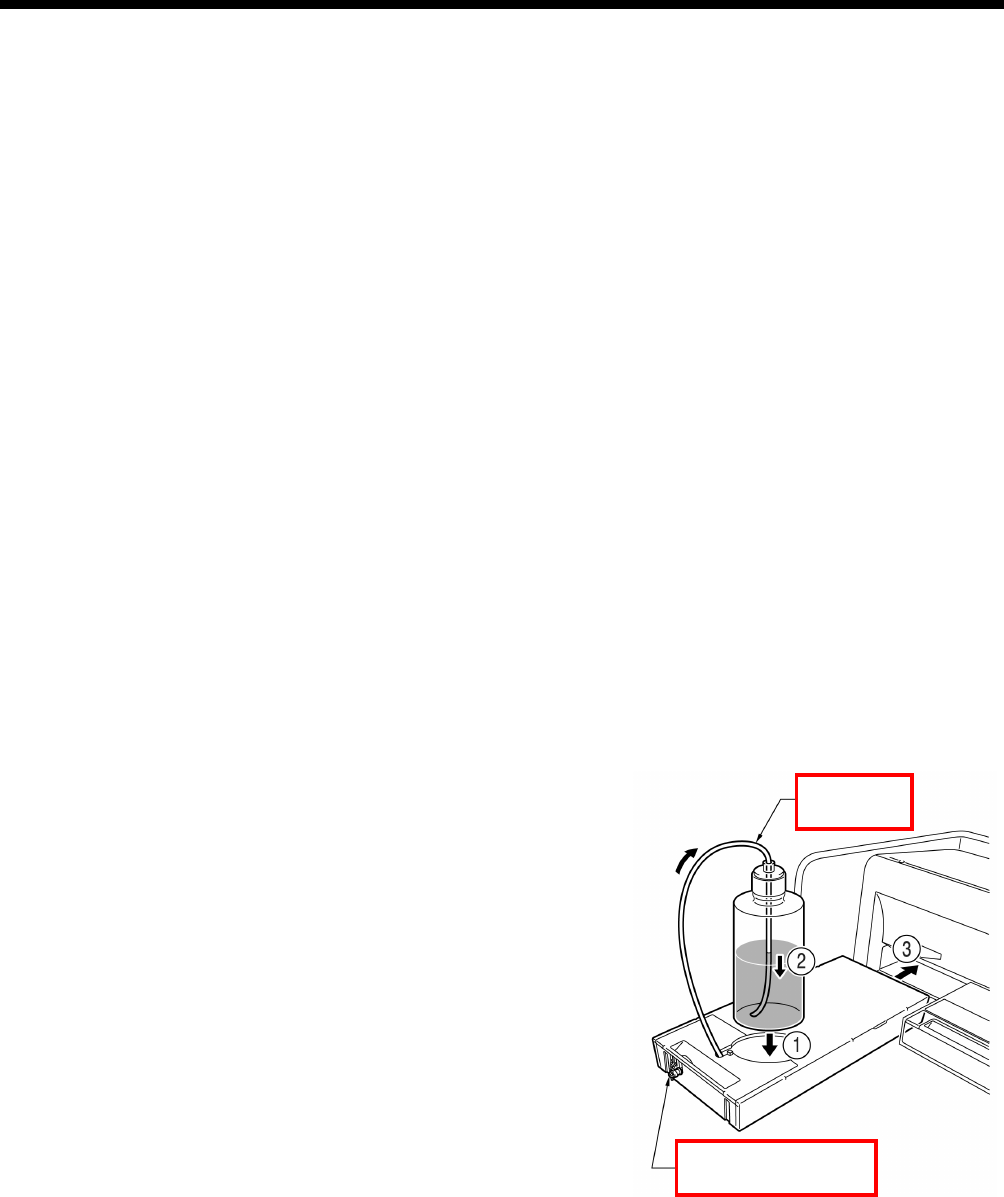
(2) Fill the bottle with Maintenance Solution (500 ml, at least more than 250 ml per one Print Head), tighten the cap and set it
in the hole of the Maintenance Cartridge (1 in the right fig.).
(3) Insert the tube of the Maintenance Cartridge to the bottom of the bottle
(2 in the right fig.).
Tube
(4) Retrieve the White Ink (follow the above-mentioned steps), remove
one White Ink Cartridge and insert the Maintenance Cartridge (3 in the
right fig.). Be sure that the Air-in Cap is capped (closed).
(5) Select "Maintenance" and "Tube Cleaning" in the right menu from the
right Control Panel. Select the Print Head and press OK button.
(6) The pump starts turning. After 30 seconds, the message indicates on
the Control Panel. Uncap (open) the air-in cap and press OK button.
The air goes into the tube and wash away the remained White Ink. It
takes about 10 minutes to wash one tube.
(7) After washing with air bubbles, only air is put through the tube to
remove the bubbles. Follow the Control Panel and insert the Filter
Cartridge with slot closed with the seal and press OK button.
Air-in Cap
4372
(8) After all Print Heads are finished, confirm that the tube cleaning is
successfully done (check if the tube before/after the Pre-filter is
transparent ). Select "Maintenance" and "Initial Cleaning" to let the
White Ink in the tube. If you leave the printer unused, fill the
Maintenance Solution in the tube. (See "6-1-6. Required Maintenance
for the Long Storage".


