93
Adjusting Image Quality (Image Adjustment)
Operation Setting Functions from Menus
• [Off] is the factory default.
• The adjustments you have made are stored
as adjusted values for the input signals and
image mode of the current projection.
• Adjustments are not applied to the
displayed menu screen itself.
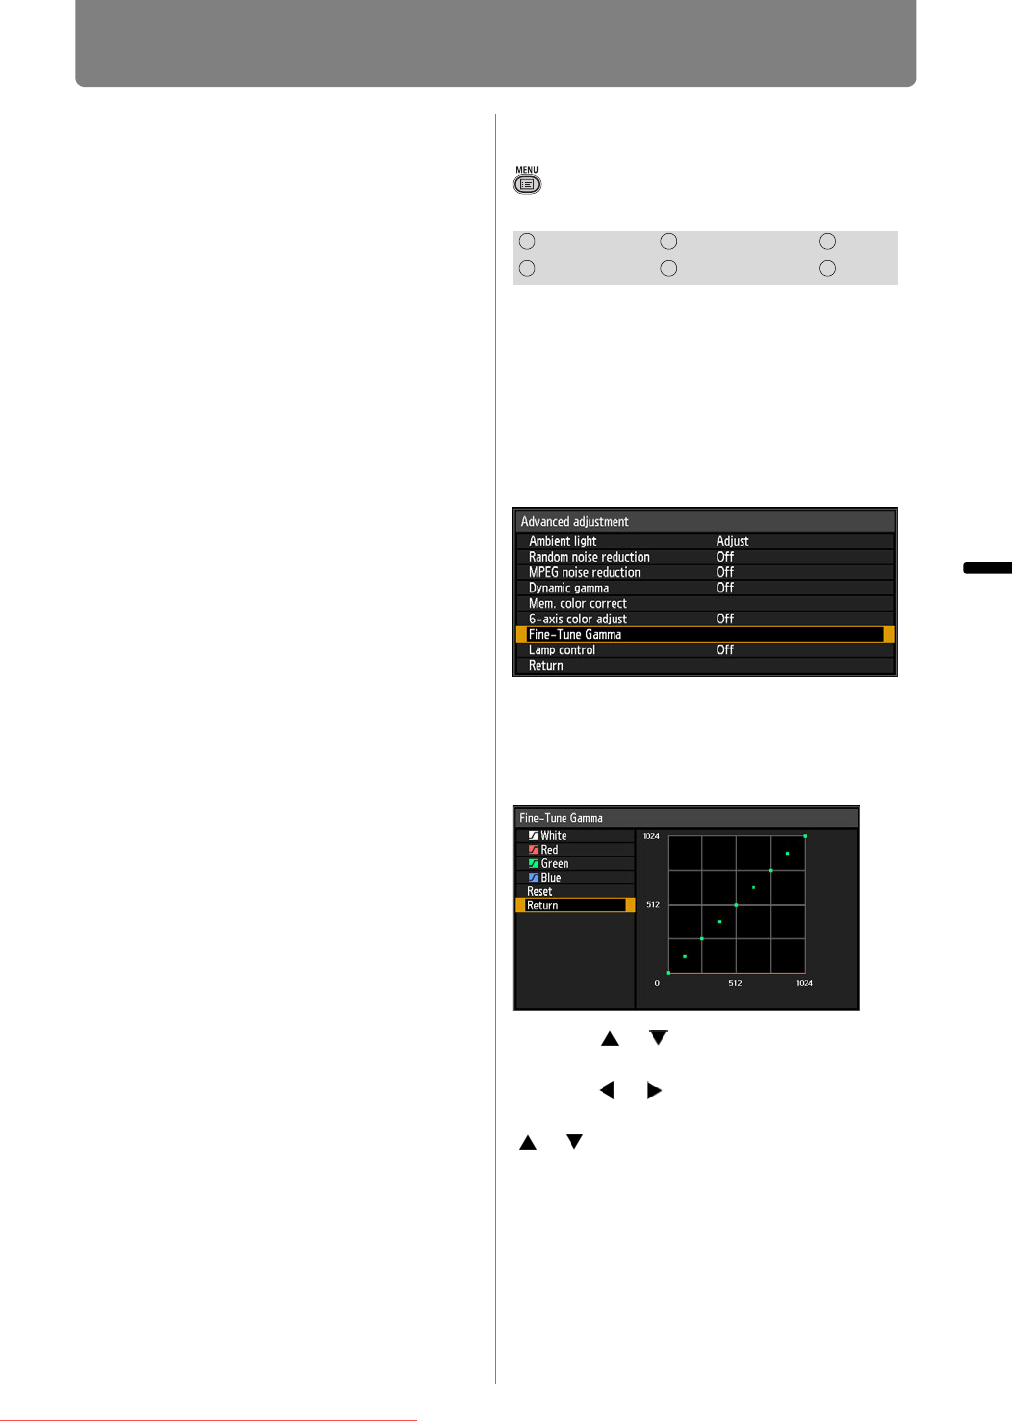
Fine-Tuning Gamma
> [Image adjustment] > [Advanced
adjustment] >
[Fine-Tune Gamma]
The four gamma curves (white, red,
green, blue) can be adjusted.
Red,
green, and blue can be adjusted
separately. Adjustments to white are
also applied to the three other colors.
Note that adjusting any color will
overwrite previous adjustments.
Select [Fine-Tune Gamma] then press
the OK button. The following [Fine-
Tune Gamma] screen for confirmation
appears.
Use the [ ] / [ ] buttons to select the
color, then press the OK button. Next,
use the [ ] / [ ] buttons to select a
point on the gamma curve, and use the
[ ] / [ ] buttons to adjust the position of
the point. When you have completed
the adjustment, press the OK button to
accept your setting and then press the
MENU button.
HDMI Component LAN
Digital PC Analog PC USB
Downloaded From projector-manual.com Canon Manuals


