


69-127
Cisco ASA 5500 Series Configuration Guide using ASDM
Chapter 69 General VPN Setup
Configuring AnyConnect Host Scan
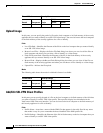
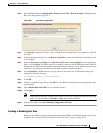
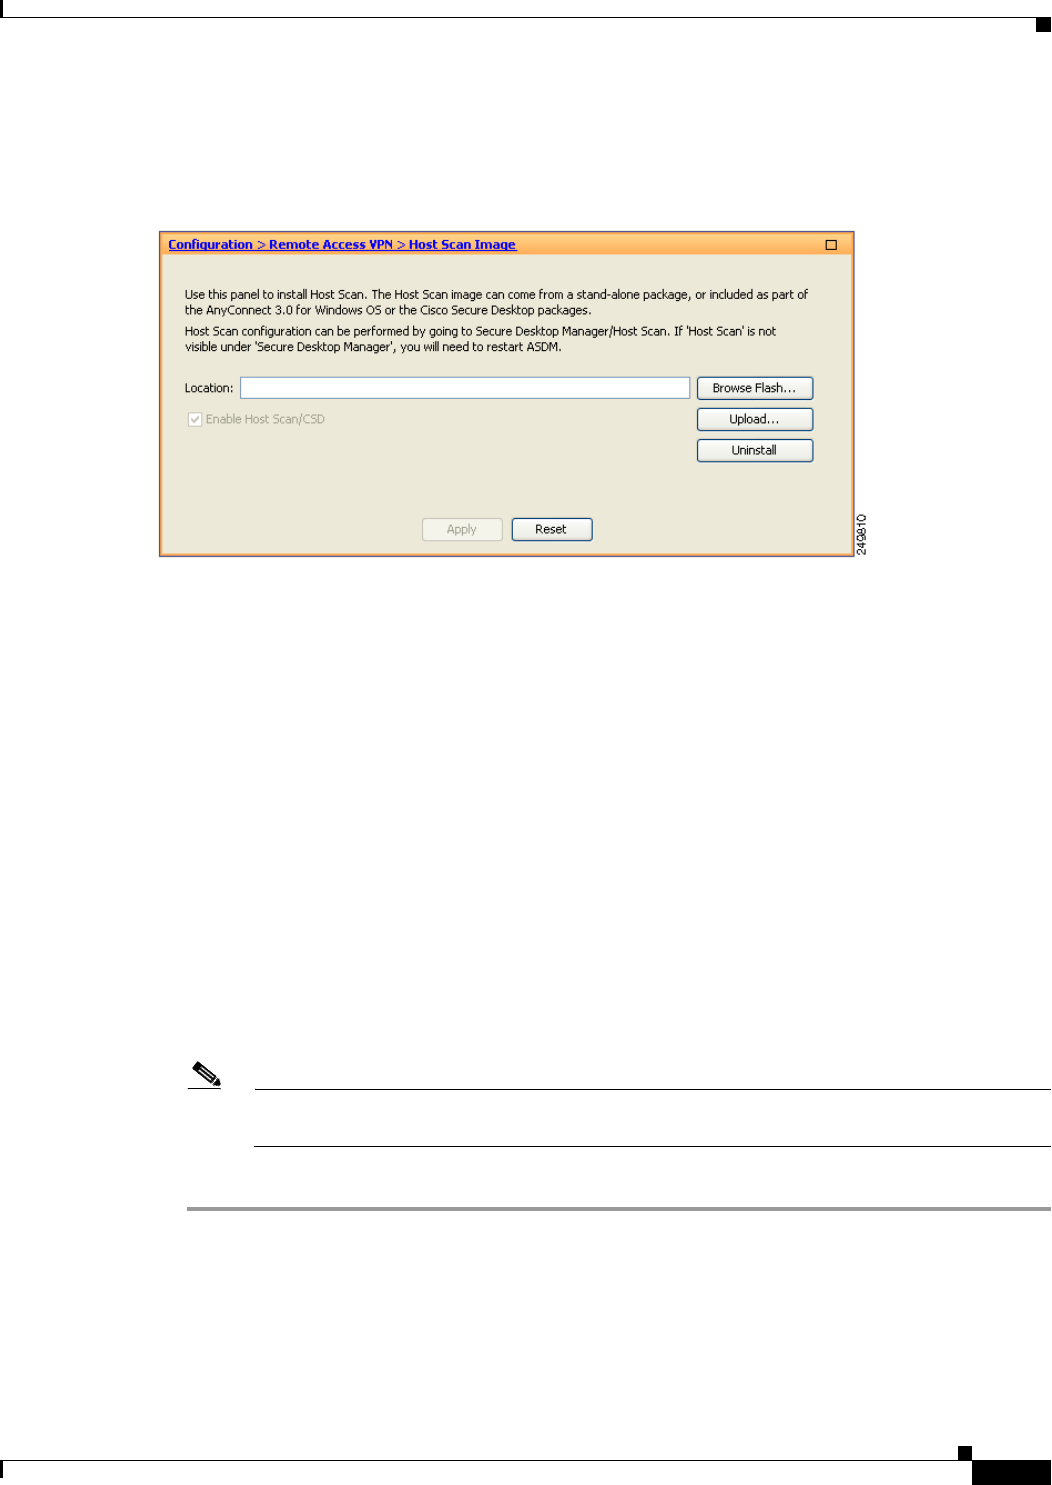
Step 2 Open ASDM and choose Configuration > Remote Access VPN > Host Scan Image. ASDM opens the
Host Scan Image panel (Figure 69-7).
Figure 69-7 Host Scan Image Panel
Step 3
Click Upload to prepare to transfer a copy of the Host Scan package from your computer to a drive on
the ASA.
Step 4 In the Upload Image dialog box, click Browse Local Files to search for the Host Scan package on your
local computer.
Step 5 Select the hostscan_version.pkg file or anyconnect-NGC-win-version-k9.pkg file you downloaded in
Step 1 and click Select. The path to the file you selected is in the Local File Path field and the Flash File
System Path field reflects the destination path of the Host Scan package. If your ASA has more than one
flash drive, you can edit the Flash File System Path to indicate another flash drive.
Step 6 Click Upload File. ASDM transfers a copy of the file to the flash card. An Information dialog box
displays the following message:
File has been uploaded to flash successfully.
Step 7 Click OK.
Step 8 In the Use Uploaded Image dialog, click OK to use the Host Scan package file you just uploaded as the
current image.
Step 9 Check Enable Host Scan/CSD if it is not already checked.
Step 10 Click Apply.
Note If AnyConnect Essentials is enabled on the ASA, you receive a message that CSD will not work
with it. You have the choice to Disable or Keep AnyConnect Essentials.
Step 11 From the File menu, select Save Running Configuration To Flash.
Enabling or Disabling Host Scan
When you first install or upgrade a Host Scan image using ASDM, you enable the image as part of that
procedure. See “Installing and Enabling Host Scan on the ASA” section on page 69-126.