


39-16
Cisco ASA 5500 Series Configuration Guide using ASDM
Chapter 39 Configuring the Identity Firewall
Task Flow for Configuring the Identity Firewall
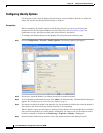
Configuring Identity Options
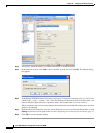
Use this pane to add or edit the Identity Firewall feature; select the Enable check box to enable the
feature. By default, the Identity Firewall feature is disabled.
Prerequisites
Before configuring the identify options for the Identity Firewall, you must you must meet the
prerequisites for the AD Agent and Microsoft Active Directory. See Prerequisites, page 9 the
requirements for the AD Agent and Microsoft Active Directory installation.
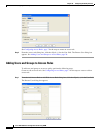
To configure the Identity Options for the Identity Firewall, perform the following steps:
Step 1 Choose Configuration > Firewall > Identity Options. The Identity Option pane appears.
Step 2 If necessary, check the Enable User Identity check box to enable the feature.
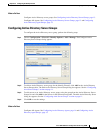
Step 3 To add a domain for the Identity Firewall, click Add by the Domains table. The Add Domain dialog box
appears. See Configuring the Active Directory Domain, page 11.
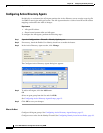
Step 4 For domains already been added to the Domains list, check whether to disable rules when the domain is
down because the Active Directory domain controller is not responding.
When a domain is down and this option is checked for that domain, the ASA disables the user identity
rules associated with the users in that domain. Additionally, the status of all user IP addresses in that
domain are marked as disabled in the Monitoring > Properties > Identity > Users pane.
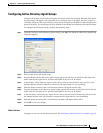
Step 5 From the Default Domain drop-down list, select the default domain for the Identity Firewall.