13-7
Cisco ASA 5500 Series Configuration Guide using ASDM
Chapter 13 Starting Interface Configuration (ASA 5505)
Starting ASA 5505 Interface Configuration
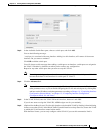
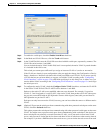
Step 3 In the Available Switch Ports pane, choose a switch port, and click Add.
You see the following message:
“switchport is associated with name interface. Adding it to this interface, will remove it from name
interface. Do you want to continue?”
Click OK to add the switch port.
You will always see this message when adding a switch port to an interface; switch ports are assigned to
the VLAN 1 interface by default even when you do not have any configuration.
Repeat for any other switch ports that you want to carry this VLAN.
Note Removing a switch port from an interface essentially just reassigns that switch port to VLAN 1,
because the default VLAN interface for switch ports is VLAN 1.
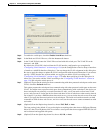
Step 4 Click the Advanced tab.
Note You receive an error message about setting the IP address. You can either set the IP address and
other parameters now, or you can finish configuring the VLAN and switch ports by clicking Yes,
and later set the IP address and other parameters according to Chapter 14, “Completing Interface
Configuration (Routed Mode),” or Chapter 15, “Completing Interface Configuration
(Transparent Mode, 8.4 and Later).”
Step 5 In the VLAN ID field, enter the VLAN ID for this interface, between 1 and 4090.
If you do not want to assign the VLAN ID, ASDM assigns one for you randomly.
Step 6 (Optional for the Base license) To allow this interface to be the third VLAN by limiting it from initiating
contact to one other VLAN, in the Block Traffic From this Interface to drop-down list, choose the VLAN
to which this VLAN interface cannot initiate traffic.
With the Base license, you can only configure a third VLAN if you use this command to limit it.


