72-92
Cisco ASA 5500 Series Configuration Guide using ASDM
Chapter 72 Configuring Clientless SSL VPN
Customizing Clientless SSL VPN Pages
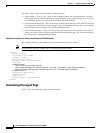
<td align=right valign=right width="800">
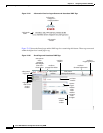
<img border="1" src="/+CSCOU+/asa5500.jpg" width="660" height="220" align="middle">
</td></tr>
</table>
Customizing the Portal Page
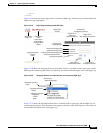
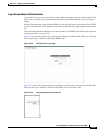
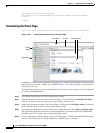
Figure 72-26 shows the portal page and the pre-defined components you can customize:
Figure 72-26 Customizable Components of the Portal Page
In addition to customizing the components of the page, you can divide the portal page into custom panes
that display text, an image, an RSS feed, or HTML. In Figure 72-26, the portal page is divided into one
column with two rows.
To customize the portal page, follow this procedure. You can preview your changes for each component
by clicking the Preview button:
Step 1 Go to Portal Page and specify a title for the browser window.
Step 2 Display and customize the title panel. Go to Portal Page > Title Panel and check Display title panel.
Enter text to display as the title and specify a logo. Specify any font styles.
Step 3 Enable and customize the toolbar. Go to Portal Page > Toolbar and check Display toolbar. Customize
the Prompt Box, Browse button, and Logout prompt as desired.
Step 4 Customize the Applications list. Go to Portal Page > Applications and check Show navigation panel.
The applications populated in the table are those applications you enabled in the ASA configuration,
including client-server plugins and port forwarding applications.
Step 5 Create custom panes in the portal page space. Go to Portal Page > Custom Panes and divide the window
into rows and columns for text, images, RSS feeds, or HTML pages, as desired.
Title Panel
Home
Page
Applications
Tool Bar Custom Panes


