


4-2
Cisco ASR 1001-X Router Hardware Installation Guide
OL-32376-02
Chapter 4 Cisco ASR 1001-X Router Installation
Guidelines for a Standalone Equipment Shelf or Tabletop Installation
Guidelines for a Standalone Equipment Shelf or Tabletop
Installation
The chassis should already be in the area where you want to install it. If you have not determined where
to install your chassis, see the “Preparing Your Site for Installation” section on page 3-1 for information
about site considerations.
When installing the Cisco ASR 1001-X Router on a sturdy equipment shelf or tabletop, ensure that the
surface is clean and that you have considered the following:
• The Cisco ASR 1001-X Router requires at least 3 inches (7.62 cm) of clearance at the inlet and
exhaust vents (the front and rear sides of the chassis).
• The Cisco ASR 1001-X Router should be installed off the floor. Dust that accumulates on the floor
is drawn into the interior of the router by the cooling fans. Excessive dust inside the router can cause
overtemperature conditions and component failures.
• There must be approximately 19 inches (48.3 cm) of clearance at the front and rear of the chassis to
install and replace FRUs, or to access network cables and equipment.
• The Cisco ASR 1001-X Router needs adequate ventilation. Do not install it in an enclosed cabinet
where ventilation is inadequate.
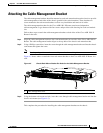
• Keep the cable-management bracket ready if you plan to install it on the front of the chassis.
• Ensure that an adequate chassis ground (earth) connection exists for your router chassis (see the
“Attaching a Chassis Ground Connection” section on page 4-10).
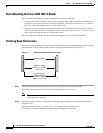
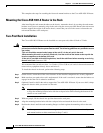
Steps for Installing the Cisco ASR 1001-X Router on a Standalone Equipment
Shelf or Tabletop Installation
To mount your Cisco ASR 1001-X Router on an equipment shelf or tabletop, follow these steps.
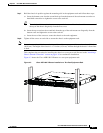
Step 1 Remove any debris and dust from the tabletop or platform, as well as the surrounding area.
Step 2 Lift the chassis into position on the equipment shelf or tabletop.
Note Step 3 through Step 9 are optional if you are installing the Cisco ASR 1001-X Router on a rack
shelf. The chassis rack-mount brackets must be installed prior to installing the
cable-management brackets. See the “Attaching the Chassis Rack-Mount Brackets” section on
page 4-5 and the “Attaching the Cable Management Bracket” section on page 4-9.
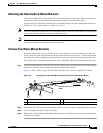
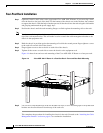
Step 3 Attach the front rack-mount brackets. Locate the threaded holes in the front sides of the chassis (first
holes beyond the vent holes) and use the package of black screws that shipped with the chassis.
Step 4 Align the front rack-mount bracket to one side of the chassis.
Step 5 Insert and tighten the screws on one side.
Step 6 Repeat Step 2 through Step 3 on the other side of the chassis. Use all the screws to secure the rack-mount
brackets to the chassis.