4-9
Cisco ASR 1001-X Router Hardware Installation Guide
OL-32376-02
Chapter 4 Cisco ASR 1001-X Router Installation
Attaching the Cable Management Bracket
Attaching the Cable Management Bracket
The cable management brackets should be mounted to each rack-mount bracket on the chassis to provide
cable management to both sides of the chassis (parallel with card orientation). These brackets are
screw-mounted to the rack-mount brackets to allow easy installation and removal of cables.
The cable-management brackets for the Cisco ASR 1001-X Router contain one independent
cable-management U type feature with four screws and provides cable dressing for each card module
slot.
Follow these steps to attach the cable-management brackets to both sides of the Cisco ASR 1001-X
Router in the rack:
Step 1 Align the cable-management bracket to the rack-mount bracket on one side of the Cisco ASR 1001-X
Router. The cable-management bracket aligns to the top hole of the chassis rack-mount bracket.
Step 2 Using a Phillips screwdriver, insert the screw through the cable management bracket and into the chassis
rack-mount and tighten the screw.
Note Use the package of screws that came with your chassis containing four screws.
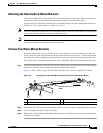
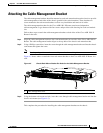
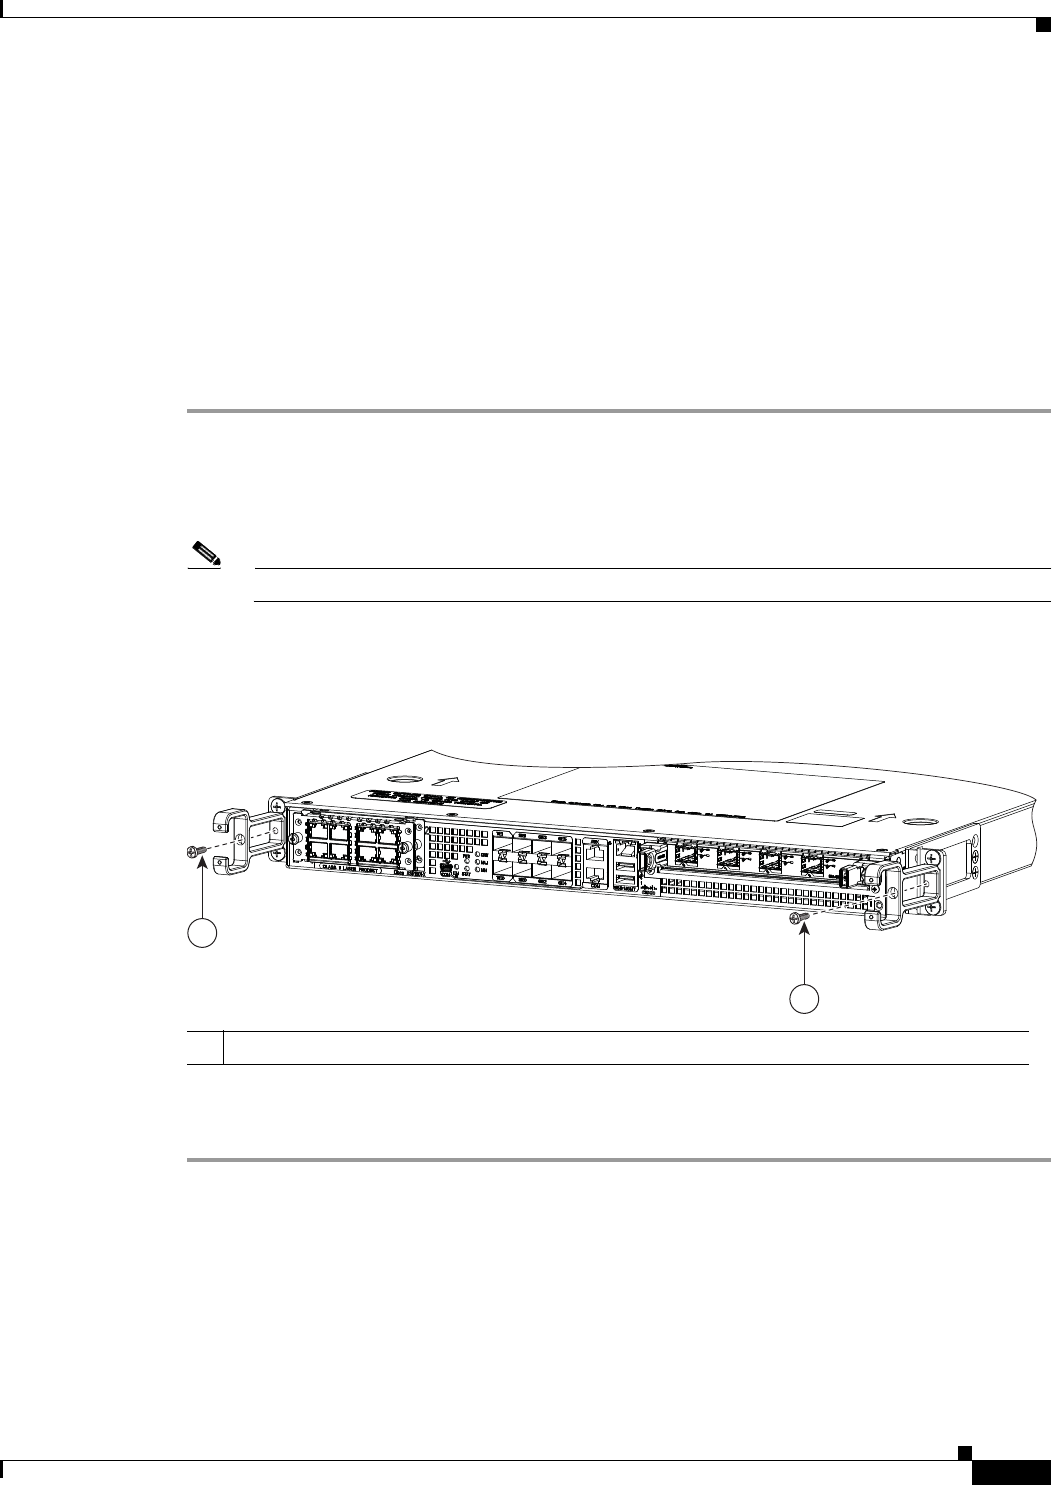
Figure 4-5 shows where to attach the front rack-mount brackets to the Cisco ASR 1001-X Router in a
rack.
Figure 4-5 Chassis Rack-Mount Bracket Ear Holes for the Cable-Management Bracket
Step 3
Using the bottom rack-mount ear hole, insert the screw through cable-management bracket and into the
chassis rack-mount (see Figure 4-5).
This completes the procedure for installing the cable-management brackets on the chassis.
1 Cable management screw
371081
1
1


