


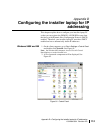


Appendix D • Configuring the installer laptop for IP addressing
118
1031484-0001 Revision 2.a
Windows XP
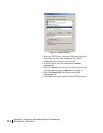
1. Go to Start→Settings→Control Panel. Double-click the
Network and Dial-up Connections icon.
Note: If the Control Panel is in category view select Network and
Internet Connections then select Network Connections.
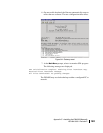
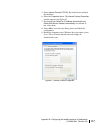
2. A list of network adapters will be displayed. A Local Area
Connection
must be listed under LAN or High-Speed
Internet. If not, the network is not installed correctly. See
Figure 98.
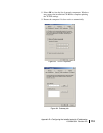
3. Right-click the
Local Area Connection icon that represents
the Network adapter that connects the computer to the
Satellite Gateway and select
Properties.
Note: If the Local Area Connection icon appears with a red X
then check your connections. The red X must not be present in
order for you to be successful.
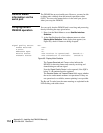
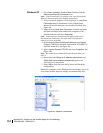
4. Ensure that the Client for Microsoft Networks and Internet
Protocol (TCP/IP)
are installed and checked. If NetBEUI is
installed, uninstall it. See Figure 99.
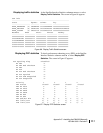
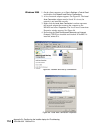
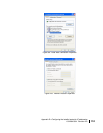
5. Select
Internet Protocol (TCP/IP) and select Properties. See
Figure 100.
Note: Be careful not to uncheck the Internet Protocol when you
select it
6. Ensure that both Obtain an IP address automatically and
Obtain DNS server address automatically options are
selected. If not, select them.
7. Select OK to close the open dialog boxes and finish the
configuration.
Restart the computer even if Windows does not require you to do
so to ensure that the network settings are automatically reset.
Figure 98: Network Connections