


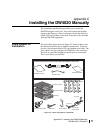


Appendix C • Installing the DW4020 Manually
1031484-0001 Revision 2
85
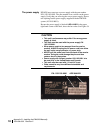
Powering up and reading
the DW4020 LED display
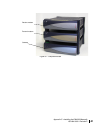
After you have assembled the DW4020, plug it into a 110 V wall
outlet, power strip, or surge protector. The Gateway LED display
will cycle as shown in Table 12. The cycling completes in less
than a minute.
The transmit and receive modems have their own LEDs, which
show their status. These are described in The DW4020 LEDs on
page 86.
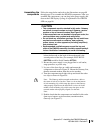
Note that normal Gateway operation alone doesn't imply normal
DW4020 operation. The installation and commissioning process
may not have been completed or software download (DLL) from
the Network Operations Center (NOC) may not have been
completed. Additional status information is available via the User
Interface. See Chapter 3 – The User Interface, on page 33) and
the LEDs on the receive and transmit modems (see
Communicating with the Gateway through the serial port on
page 95).
Note: In countries outside North America, the DW4020 may be
plugged, with a physical adapter, directly into a 220 V outlet.
Different countries may have different standards and requirements.
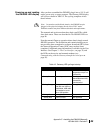
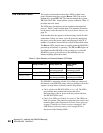
Table 12: Gateway LED cycling at startup
LED condition STATUS LED READY LED
Off Power off Power off or startup
diagnostics not yet run
successfully
Steady Green Normal operation Running software
downloaded from NOC;
successfully
commissioned
Blinking Orange Contact between GWH
and IRU over USB not
established; USB cable
not installed or some
other USB problem
Not applicable
Blinking Green Not applicable Not commissioned
Steady Red Power on tests Not applicable