


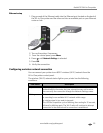


Setting Up Your Printer
24 www.kodak.com/go/aiosupport
Setting your Kodak printer as the default
For Windows XP
1. Click Start, point to Settings, and then double-click Printers and Faxes.
2. Right-click the icon for the Kodak ESP 9 printer, and then select
Set as the
Default Printer
on the shortcut menu.
For Windows Vista
1. Click Start, and then click Control Panel.
2. Click
Hardware and Sound, and then click Printers.
3. Right-click the icon for the Kodak ESP 9 printer, and then select
Set as the
Default Printer
on the shortcut menu.
For Macintosh
Whenever a new printer is installed on the Macintosh operating system, it becomes
the default printer. If you have more than one printer connected to your computer,
use the following steps to change your default printer.
1. Click
System Preferences.
2. In the
Hardware section, click Print & Fax.
3. Select the Kodak ESP 9 printer from the list of available printer as the default.
Configuring network settings
You can connect your ESP All-in-One printer to a wired (Ethernet) network or to a
wireless (Wi-Fi) network. You may refer to the “Start Here” booklet that came with
your printer, or review the following sections as needed.
Networking resources
This section only covers how to setup your printer with your existing network. It
presumes you have a working understanding on how your network is configured.
Additional resources for related topics, information, and network troubleshooting
are available at www.kodak.com/go/inkjetnetworking.
If you are unsure of how your network is configured, please contact your network
administrator or your internet service provider for assistance.
Configuring an Ethernet network connection
You will need the following items to connect the All–in–One printer to a wired
(Ethernet) network:
• A functional Ethernet network that includes a router, switch, or hub with an
Ethernet port
• A CAT-5 (or higher) Ethernet cable