www.kodak.com/go/aiosupport 33
Kodak ESP 9 All-in-One printer
Wi-Fi to Ethernet
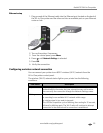
To convert the Wi-Fi connection from a PC to an Ethernet connection:
1. Connect the printer to the network (LAN port on the Router) with an Ethernet
cable.
Ethernet to Wi-Fi
To convert the Ethernet connection from a PC to a Wi-Fi connection:
1. Disconnect the Ethernet cable from the printer.
2. Configure the wireless network from the printer front panel. See Configuring a
wireless network connection, page 25.
3. Press
Menu.
4. Press until
Network Settings is selected, and then press OK.
5. Select
View Network Configuration and confirm you have an IP address.
For Macintosh
USB to Wi-Fi
To convert the USB connection from a Macintosh to a wireless network connection:
1. Disconnect the printer from the computer.
2. Configure the wireless network from the printer front panel. See Configuring a
wireless network connection, page 25.
3. Press
Menu.
4. Press until
Network Settings is selected, and then press OK.
5. Select
View Network Configuration and confirm you have an IP address.
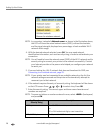
6. Open
System Preferences and then click Print & Fax. Click + button to view a list
of available printers that can be added. Network printers are labeled “Bonjour”
under “Kind”.
7. The printer will be named Kodak ESP 9-XXXX, where XXXX is a number unique
to your printer.
8. Select your printer and click
Add.
USB to Ethernet
To convert the USB connection from a Macintosh to an Ethernet connection:
1. Disconnect the printer from the computer.
2. Connect the printer to the network (LAN port on Router) with an Ethernet cable
3. Open
System Preferences and then click Print & Fax. Click + button to view a list
of available printers that can be added. Network printers are labeled “Bonjour”
under “Kind”.


