


Viewing and Printing Photos
54 www.kodak.com/go/aiosupport
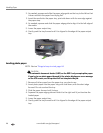
1. Connect a digital camera or portable USB drive to the front panel USB port, or
insert a memory card to the appropriate card reader on the front panel.
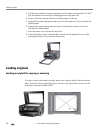
The printer displays the photos on the LCD screen, last photo first.
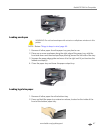
2. Load the paper tray with photo paper, print side down.
3. On the control panel, press or until a photo you want to print is displayed
on the LCD screen.
4. Press
OK to select the photo. A check mark displays on the LCD screen to
indicate your action. If you change your mind and want to de-select the photo
from printing, press
OK again; the check mark is removed.
5. If you are satisfied with the image shown, you can modify the quantity of copies
to be printed by pressing until the number you want is shown on the LCD
screen. To decrease any quantity greater than 1, press until the number you
want displays.
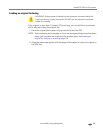
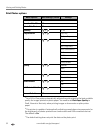
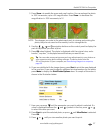
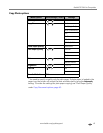
6. If you want to specify different print parameters for the photo, press
Menu to
display the
Print Photos Options menu. A sample of the menu is shown in the
illustration below.
7. Here you can press until the parameter you want to adjust is selected. If a
value is displayed between the and symbols in the row, press
or to select the value you want.
8. Press
Start to print the selected photo, or press until View Photos is selected.
9. Press or until you view another photo you want to print.
10. Repeat this process as needed.
NOTE: Each photo is automatically deselected after it has been printed
Tip: To select and print all the photos on a memory card or portable USB device
which have not yet been selected, hold down the
OK button for 2 seconds.
Holding down the
OK button again for 2 seconds de-selects all the photos.